Version 7.6.0 (+ 7.6.1)
Alright, one last update before I take a bit of rest. It’s Valentine’s Day, so here’s today’s little gift with version 7.6.0.
On that note, a quick word for Odysseus® users on iPhone and Mac. I’m well aware that you must — like me, as a fan of the brand — miss a few versions every time. Unfortunately, I have nothing to do with it. Apple’s App Store takes an absolutely crazy amount of time to review and publish updates. iPhone versions can take two or three days on average. But Mac versions are infinitely longer! I can’t do anything about it, to my great misfortune, other than wait. So from one version to the next, if Apple hasn’t put the previous one online yet (because it’s still under review), I cancel that review to make room for the new one. That’s what creates this feeling of “missing versions.” But for this one, I’m not touching anything. You’ll get it, I promise!
Let’s start with the fixes.
+ As usual, a bunch of background fixes you won’t see: buttons to move, symbols to nudge, painstaking work so everything is as consistent and visually pleasing as possible.
+ Next, fixed angles that weren’t displaying with custom points. The lines between them and the pointer weren’t being drawn. It’s fixed.
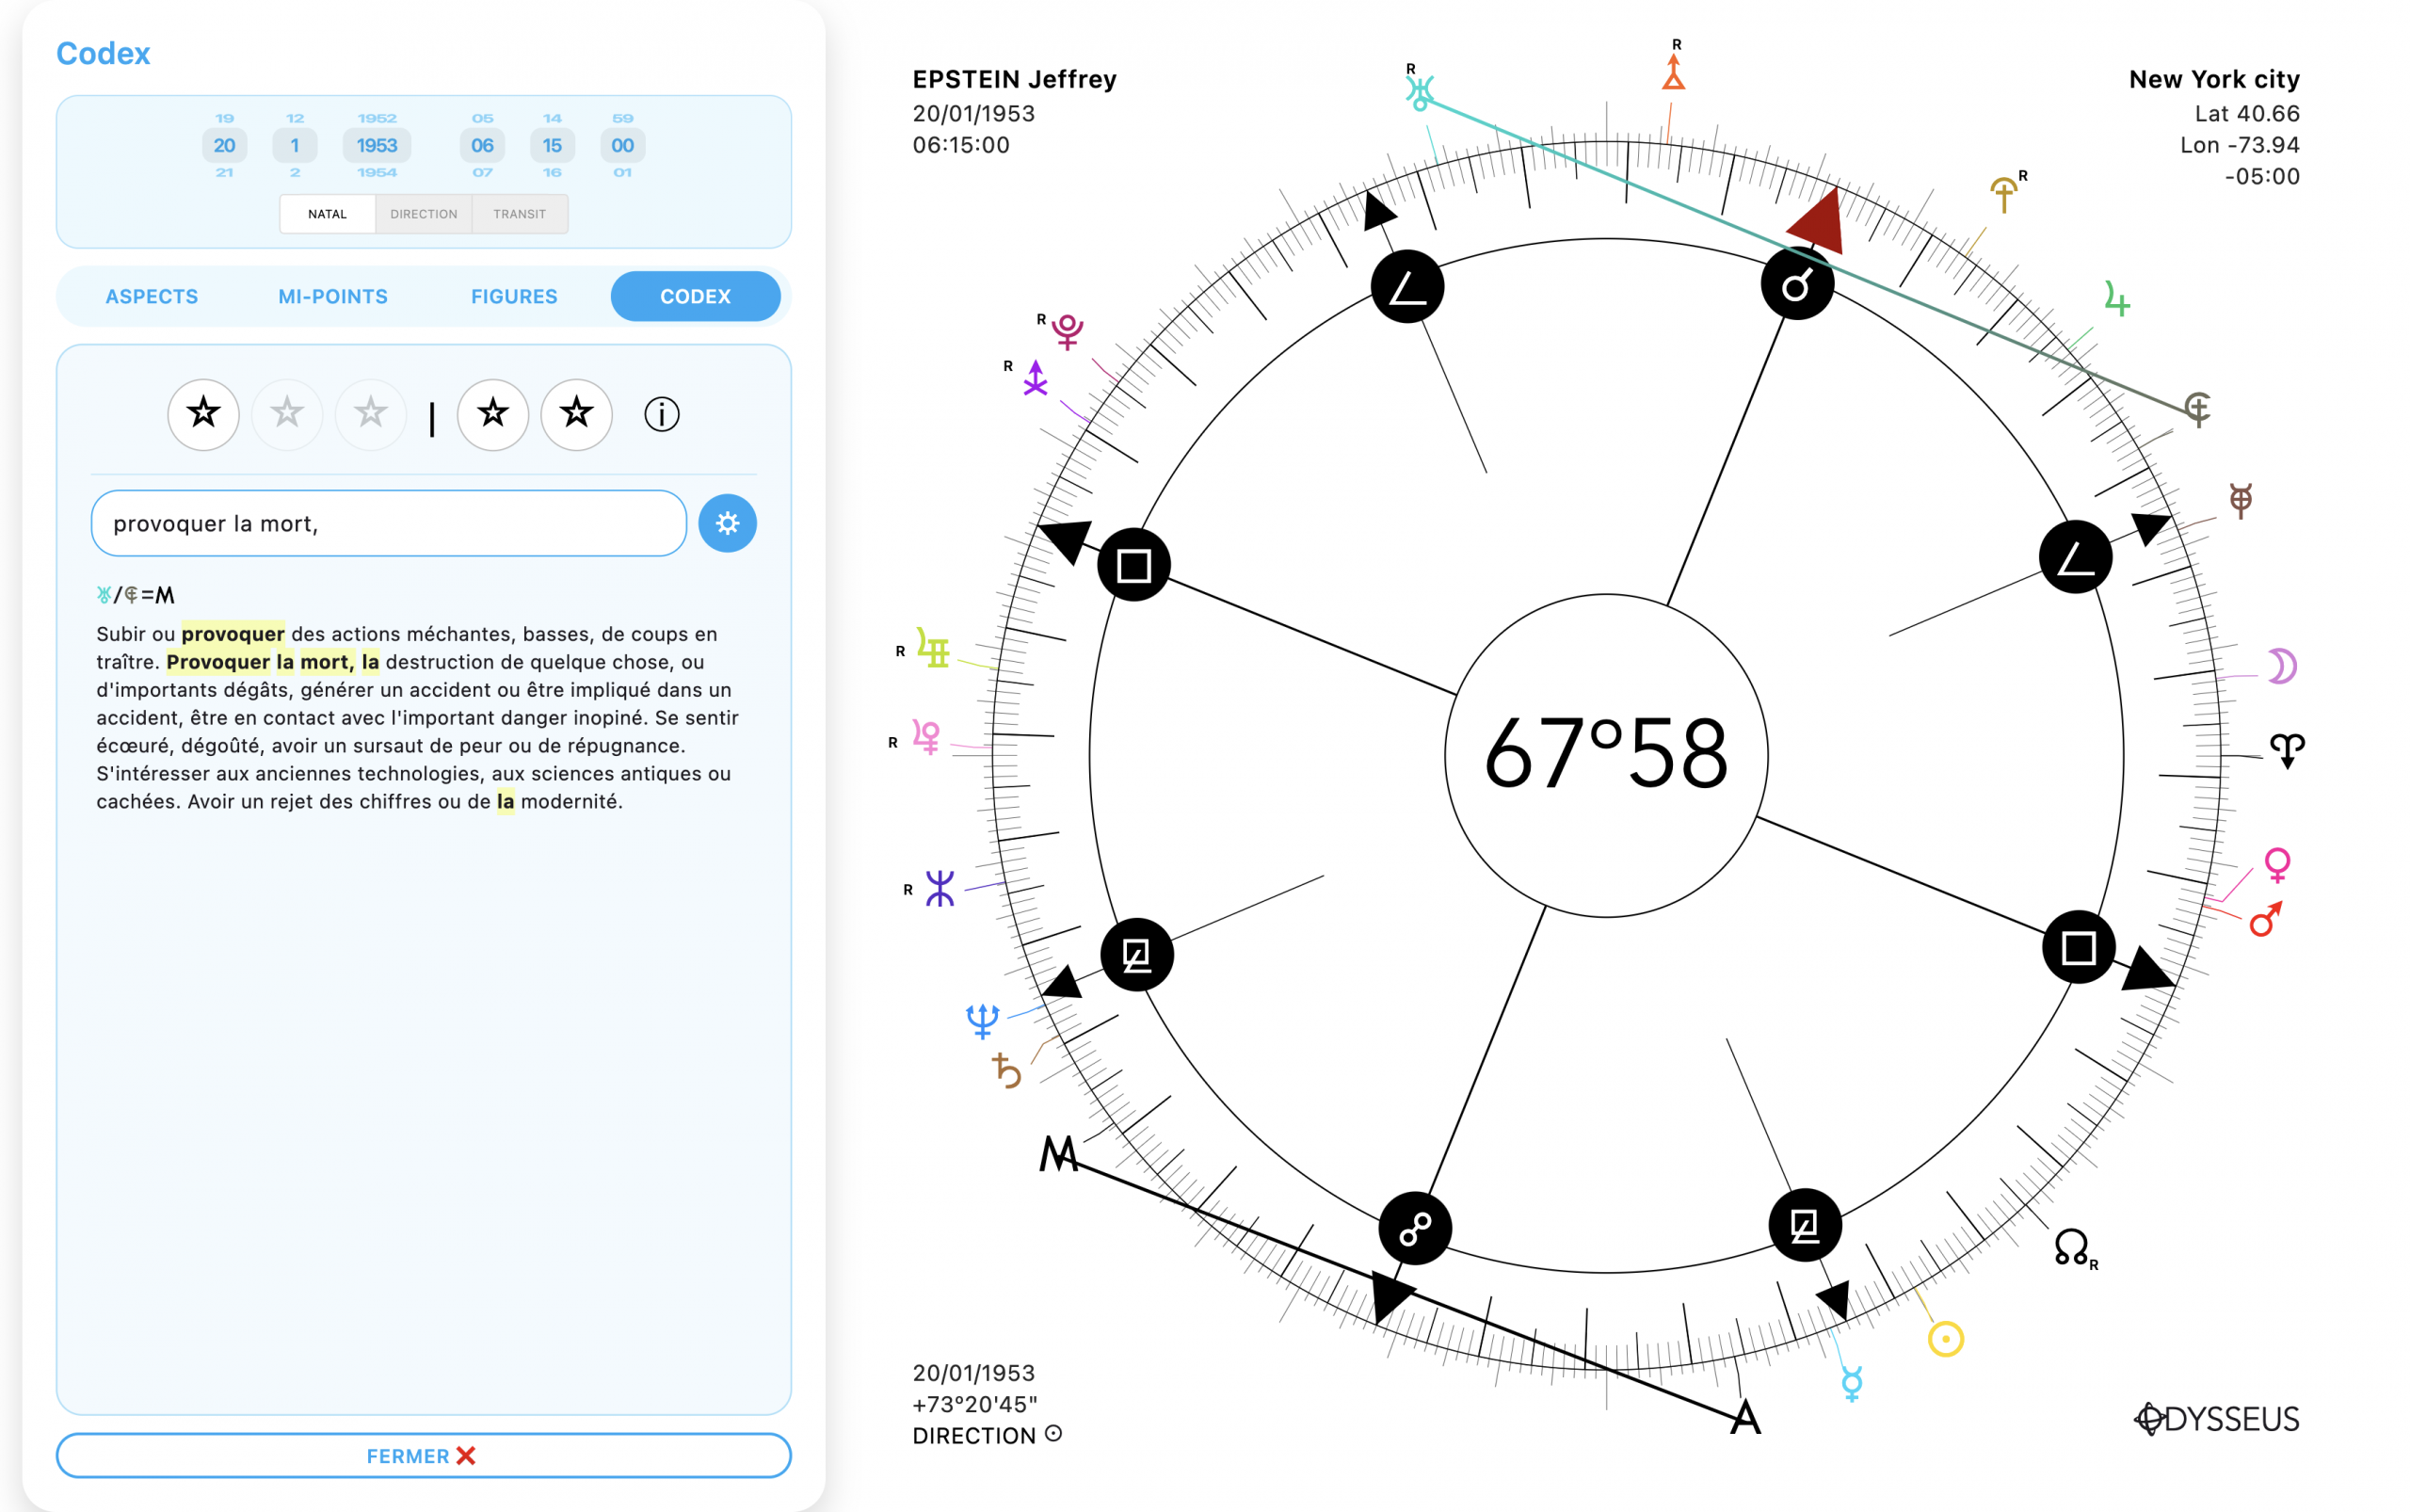
+ Fixed midpoints that sometimes appeared twice in the Codex when the midpoint in question had been created as a custom point.
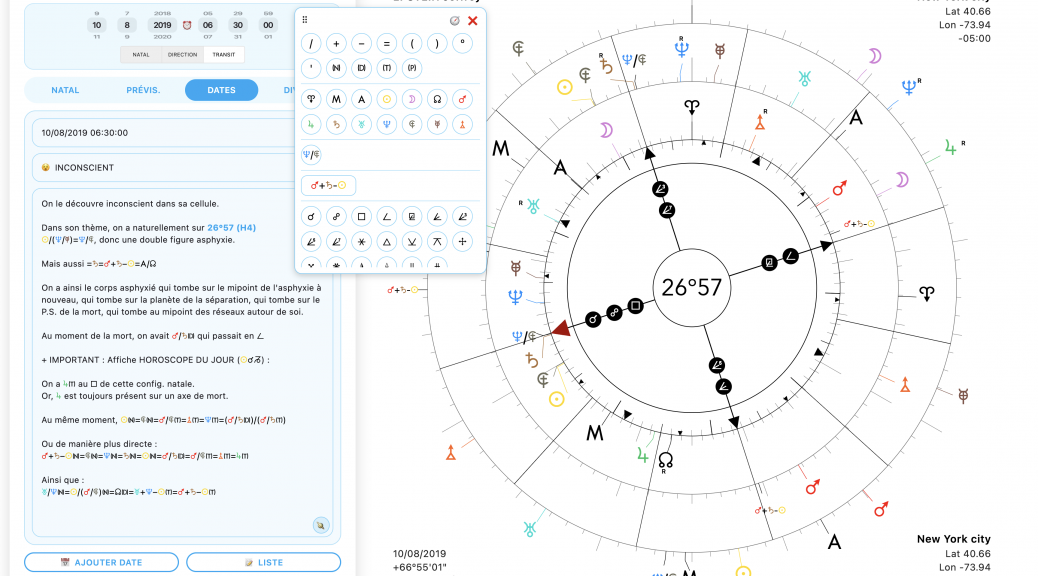
+ Fixed “horoscopes” (long-press on 🏠) that weren’t positioning correctly on harmonic wheels.
Moving on to improvements:
+ I removed the state mention for US cities in the top-right and bottom-right corners of the card, because it was taking up a ridiculous amount of space. I also made sure the info in the bottom-right is always visible as soon as the transits wheel is displayed, and not only when relocating, because that lets you see the applied time offset. This is important to verify, if you’re working on old dates, that the time you’re using is indeed the right one.
+ And also, a new visual adjustment on mobile. I’m still fine-tuning it, but let’s be honest: dear owners of small screens, you are my nightmare. Truly…
+ The drawing tools now come with a simple arrow tool → and a double arrow tool ↔ (hi Raj!)
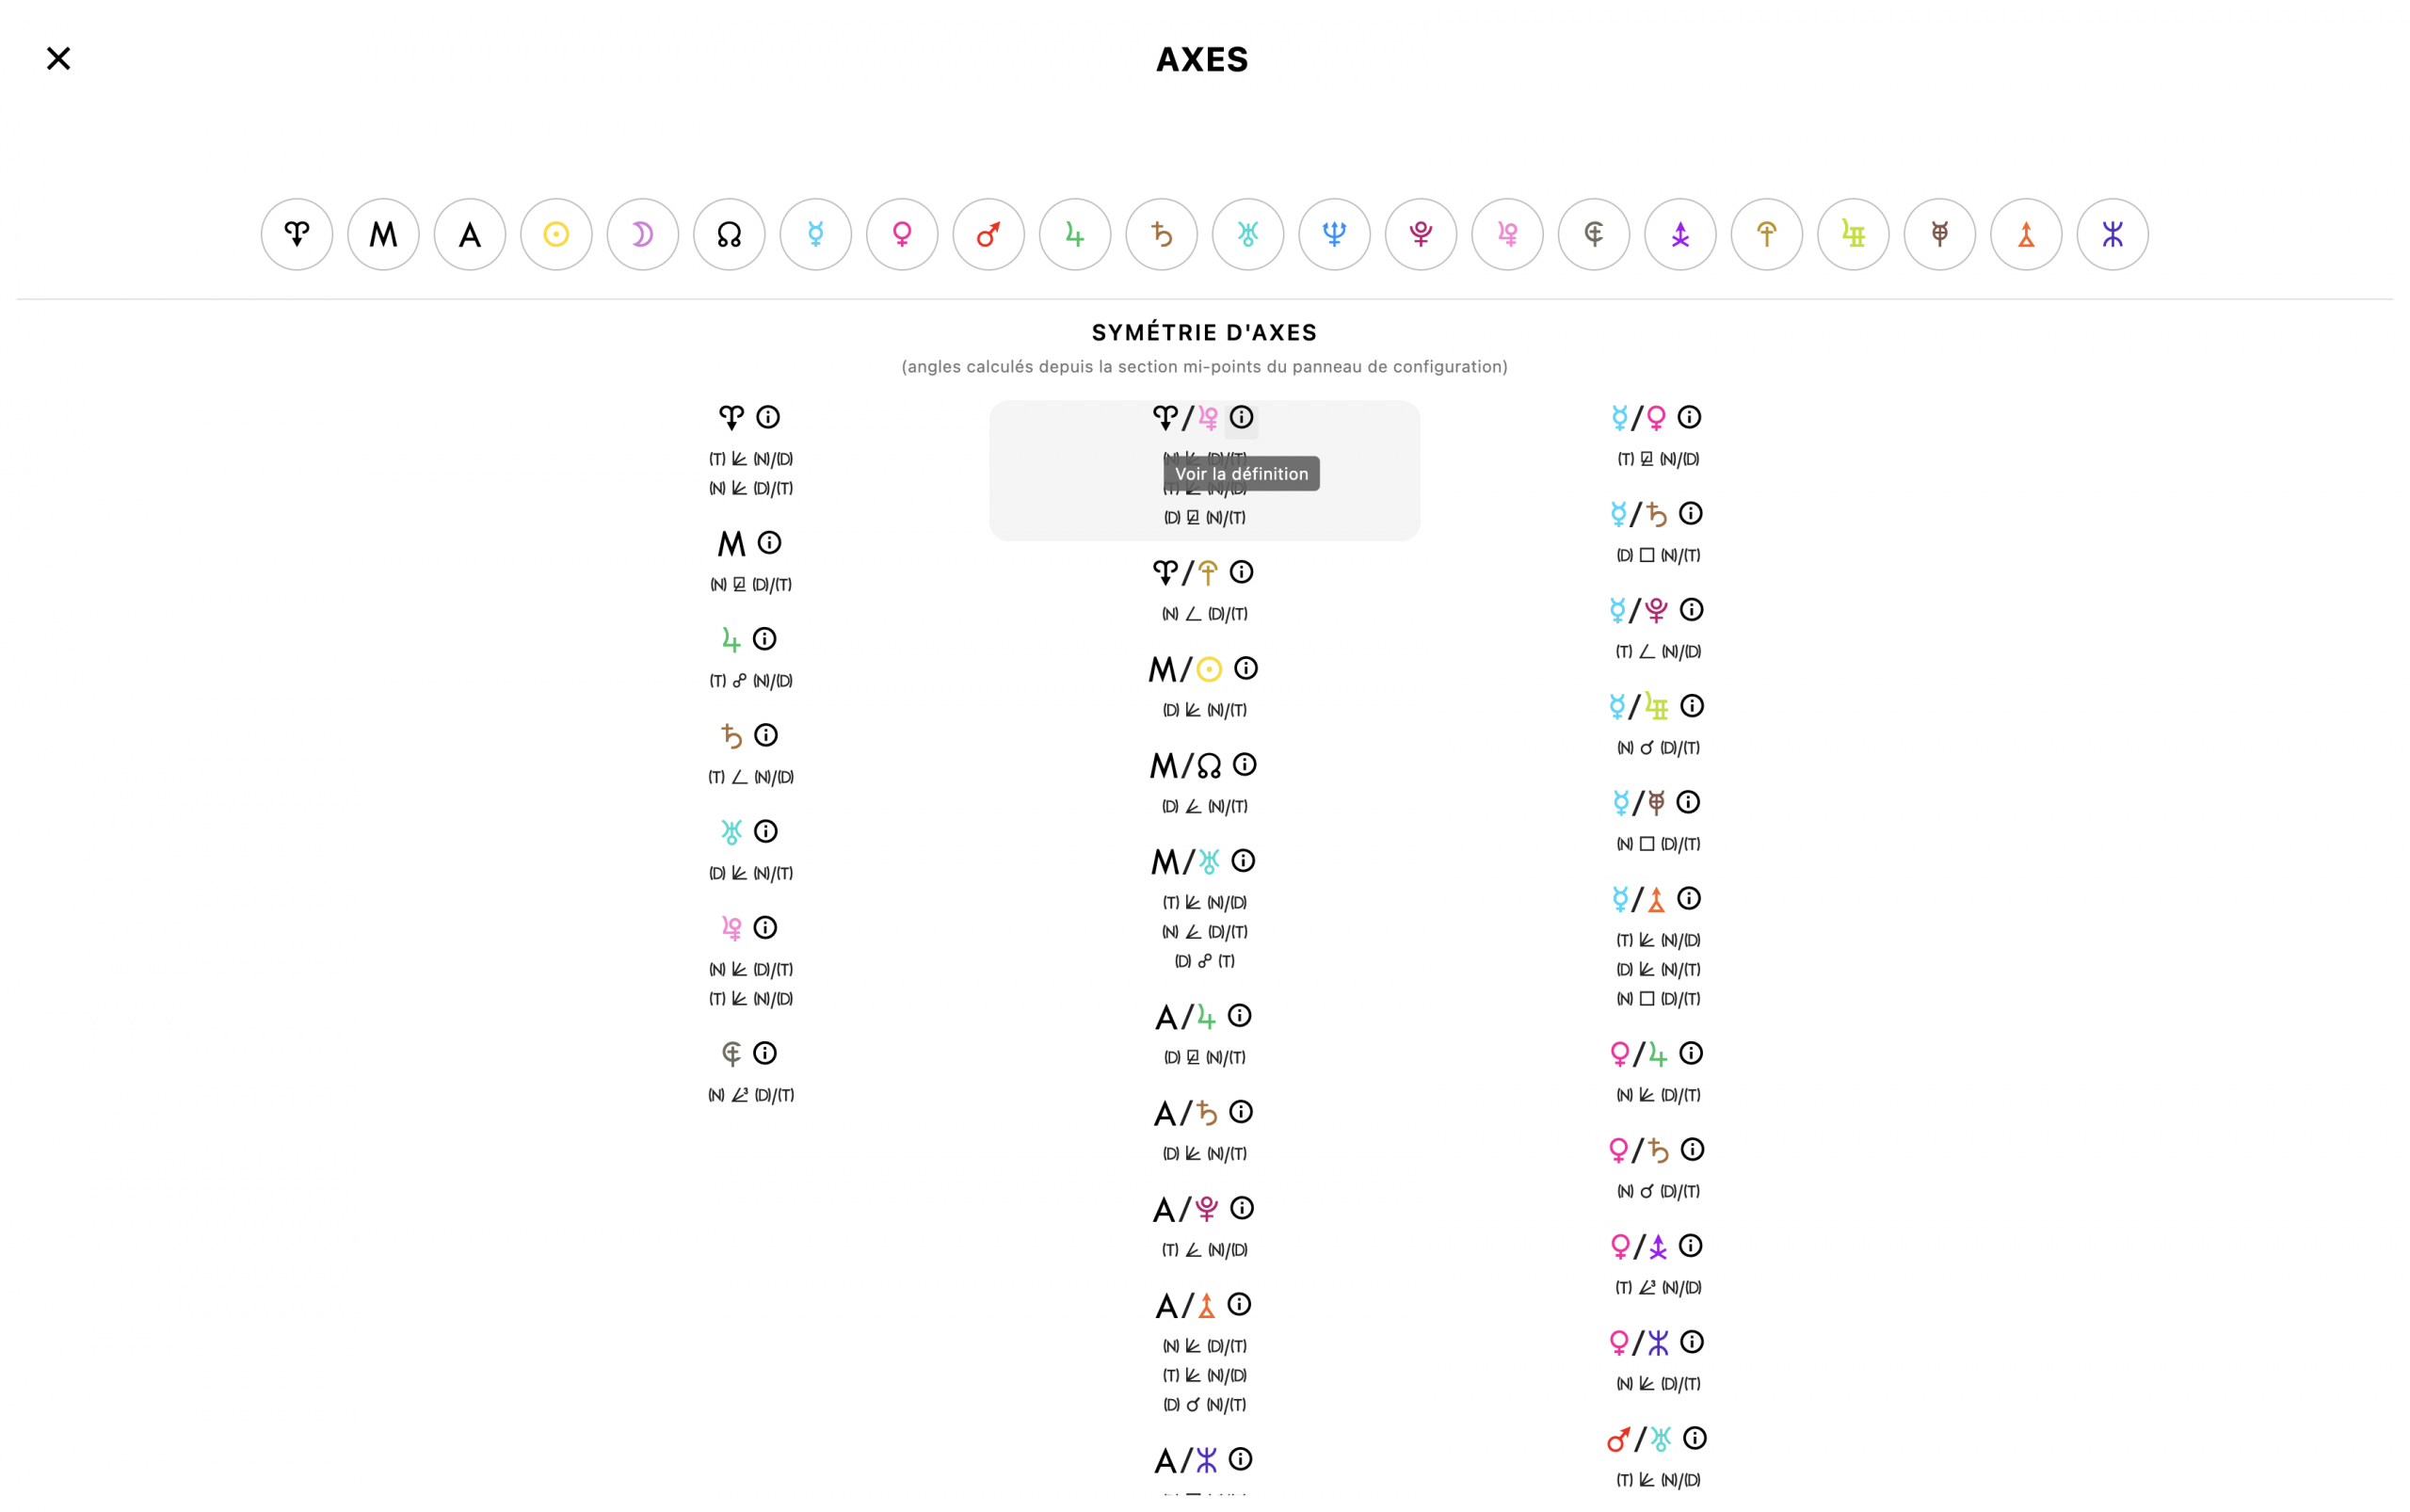
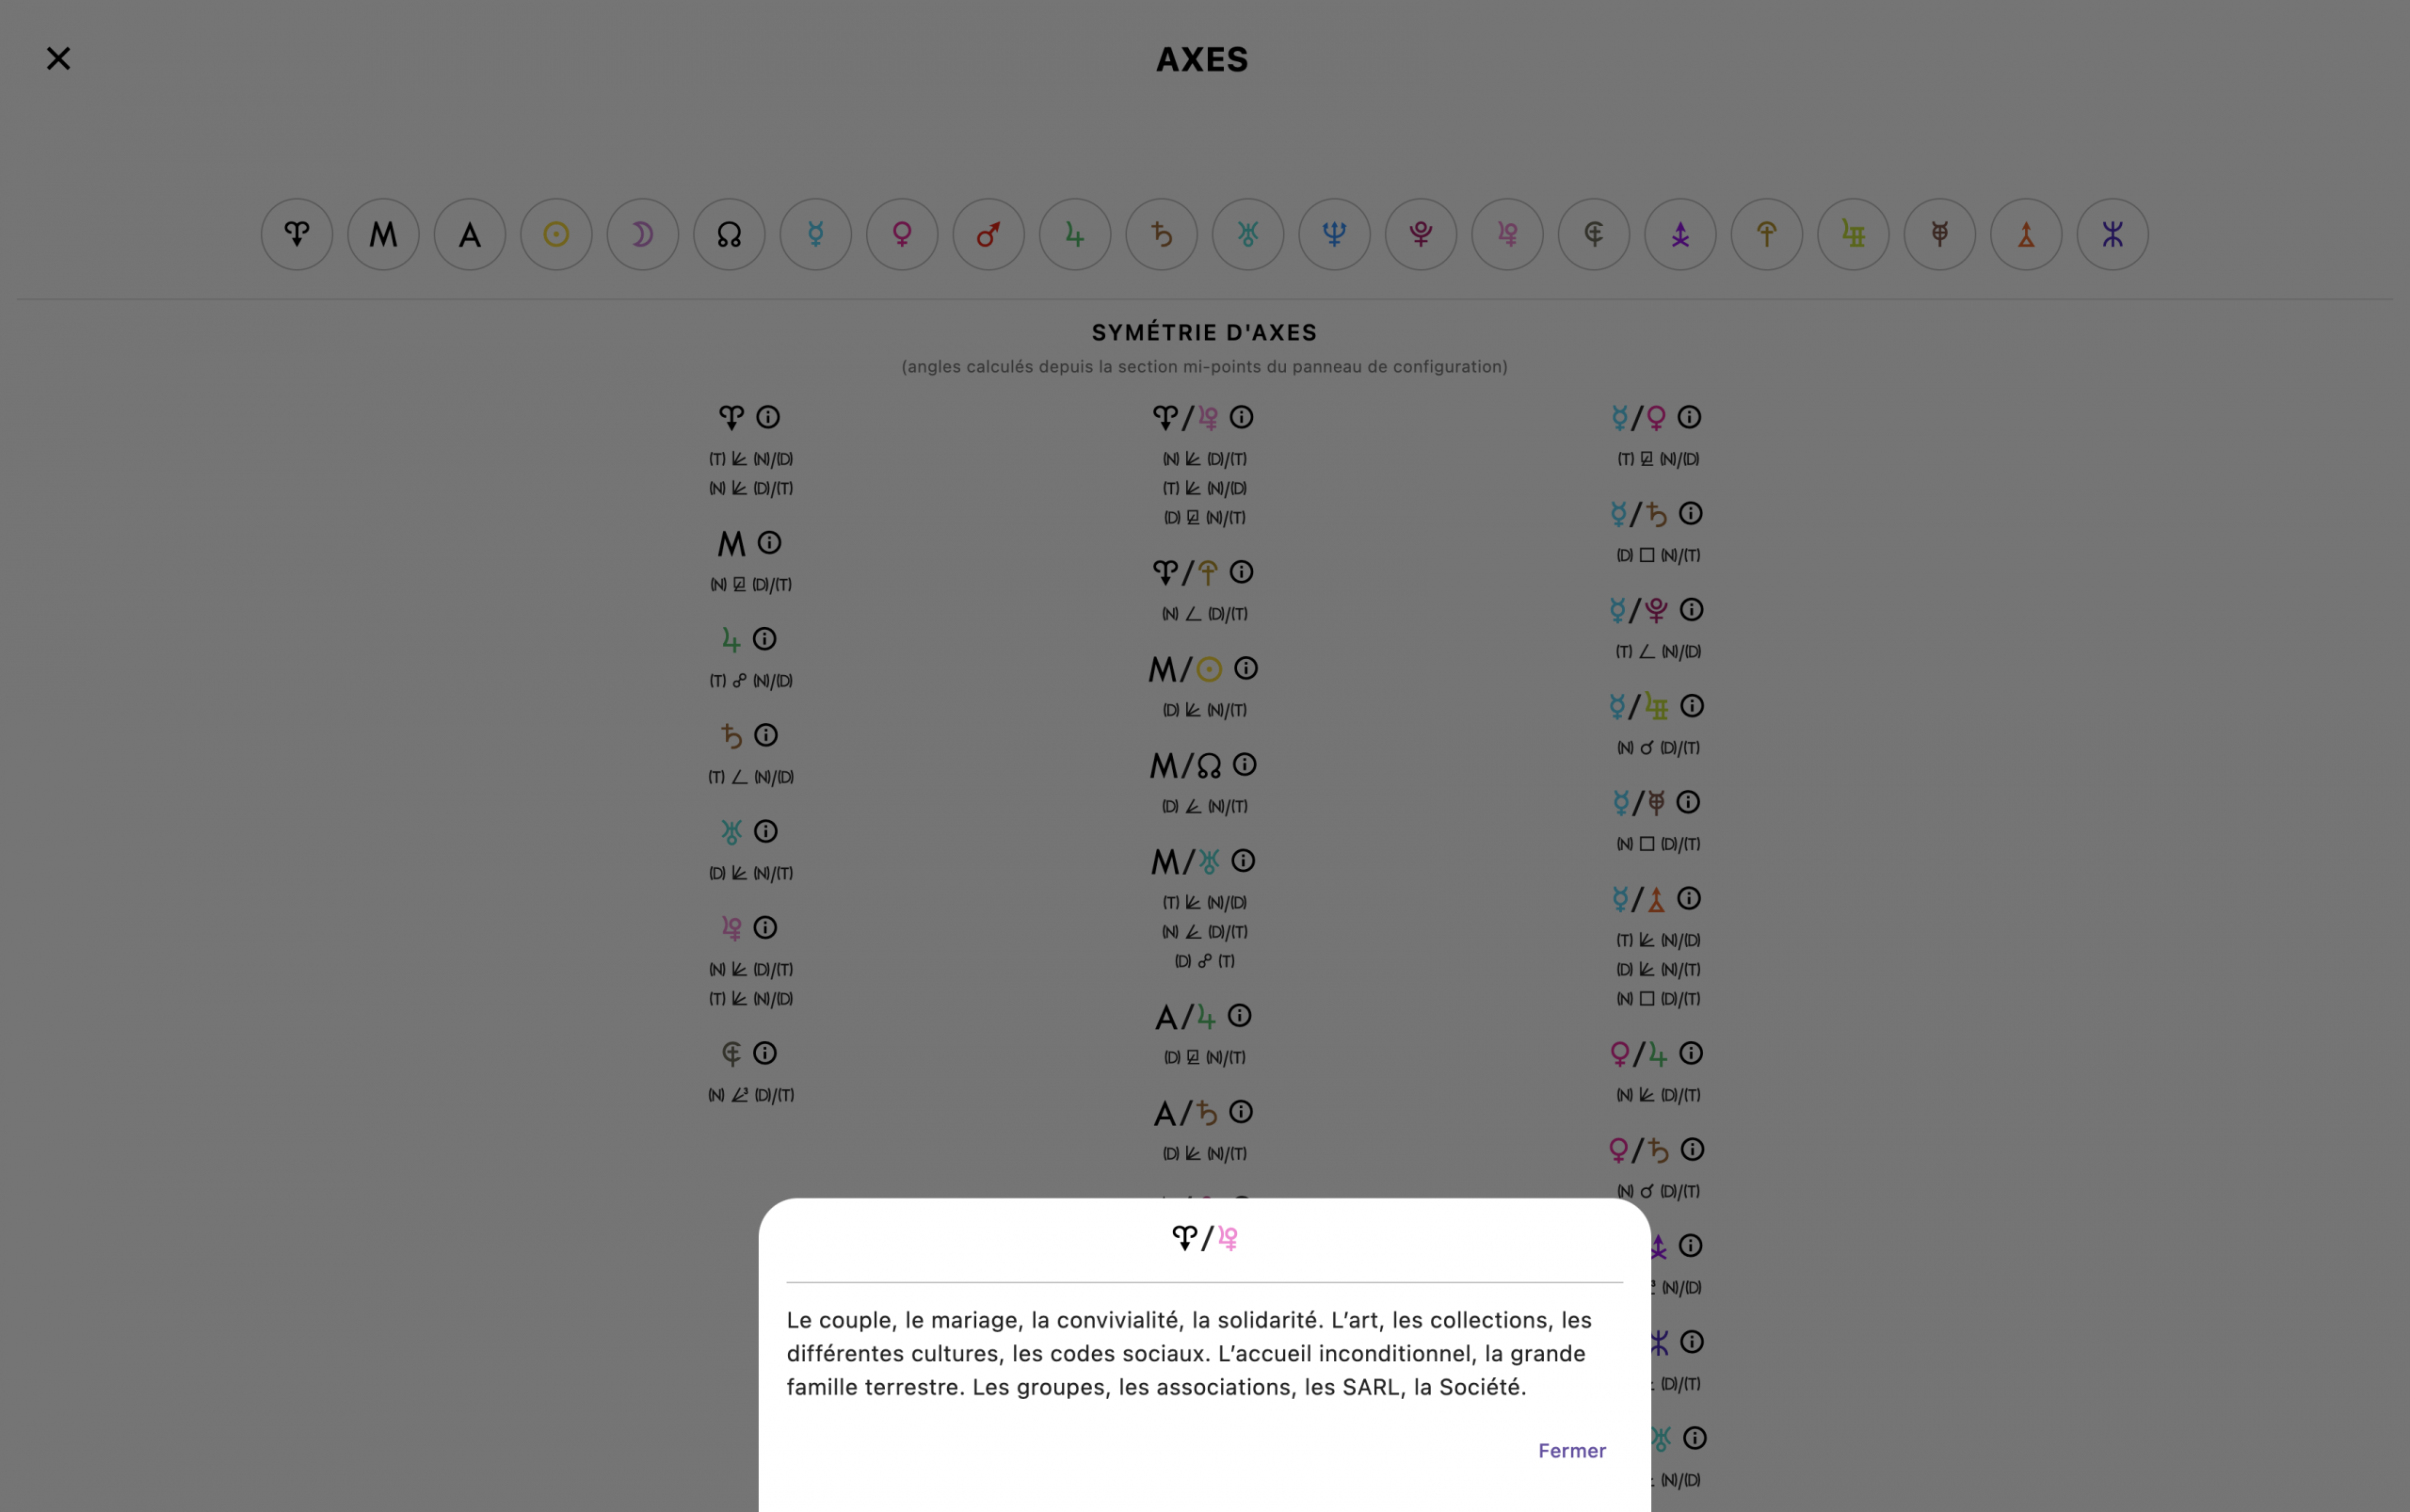
+ Then, I added the famous ⓘ to display definitions on the axes page and in the symmetries list.
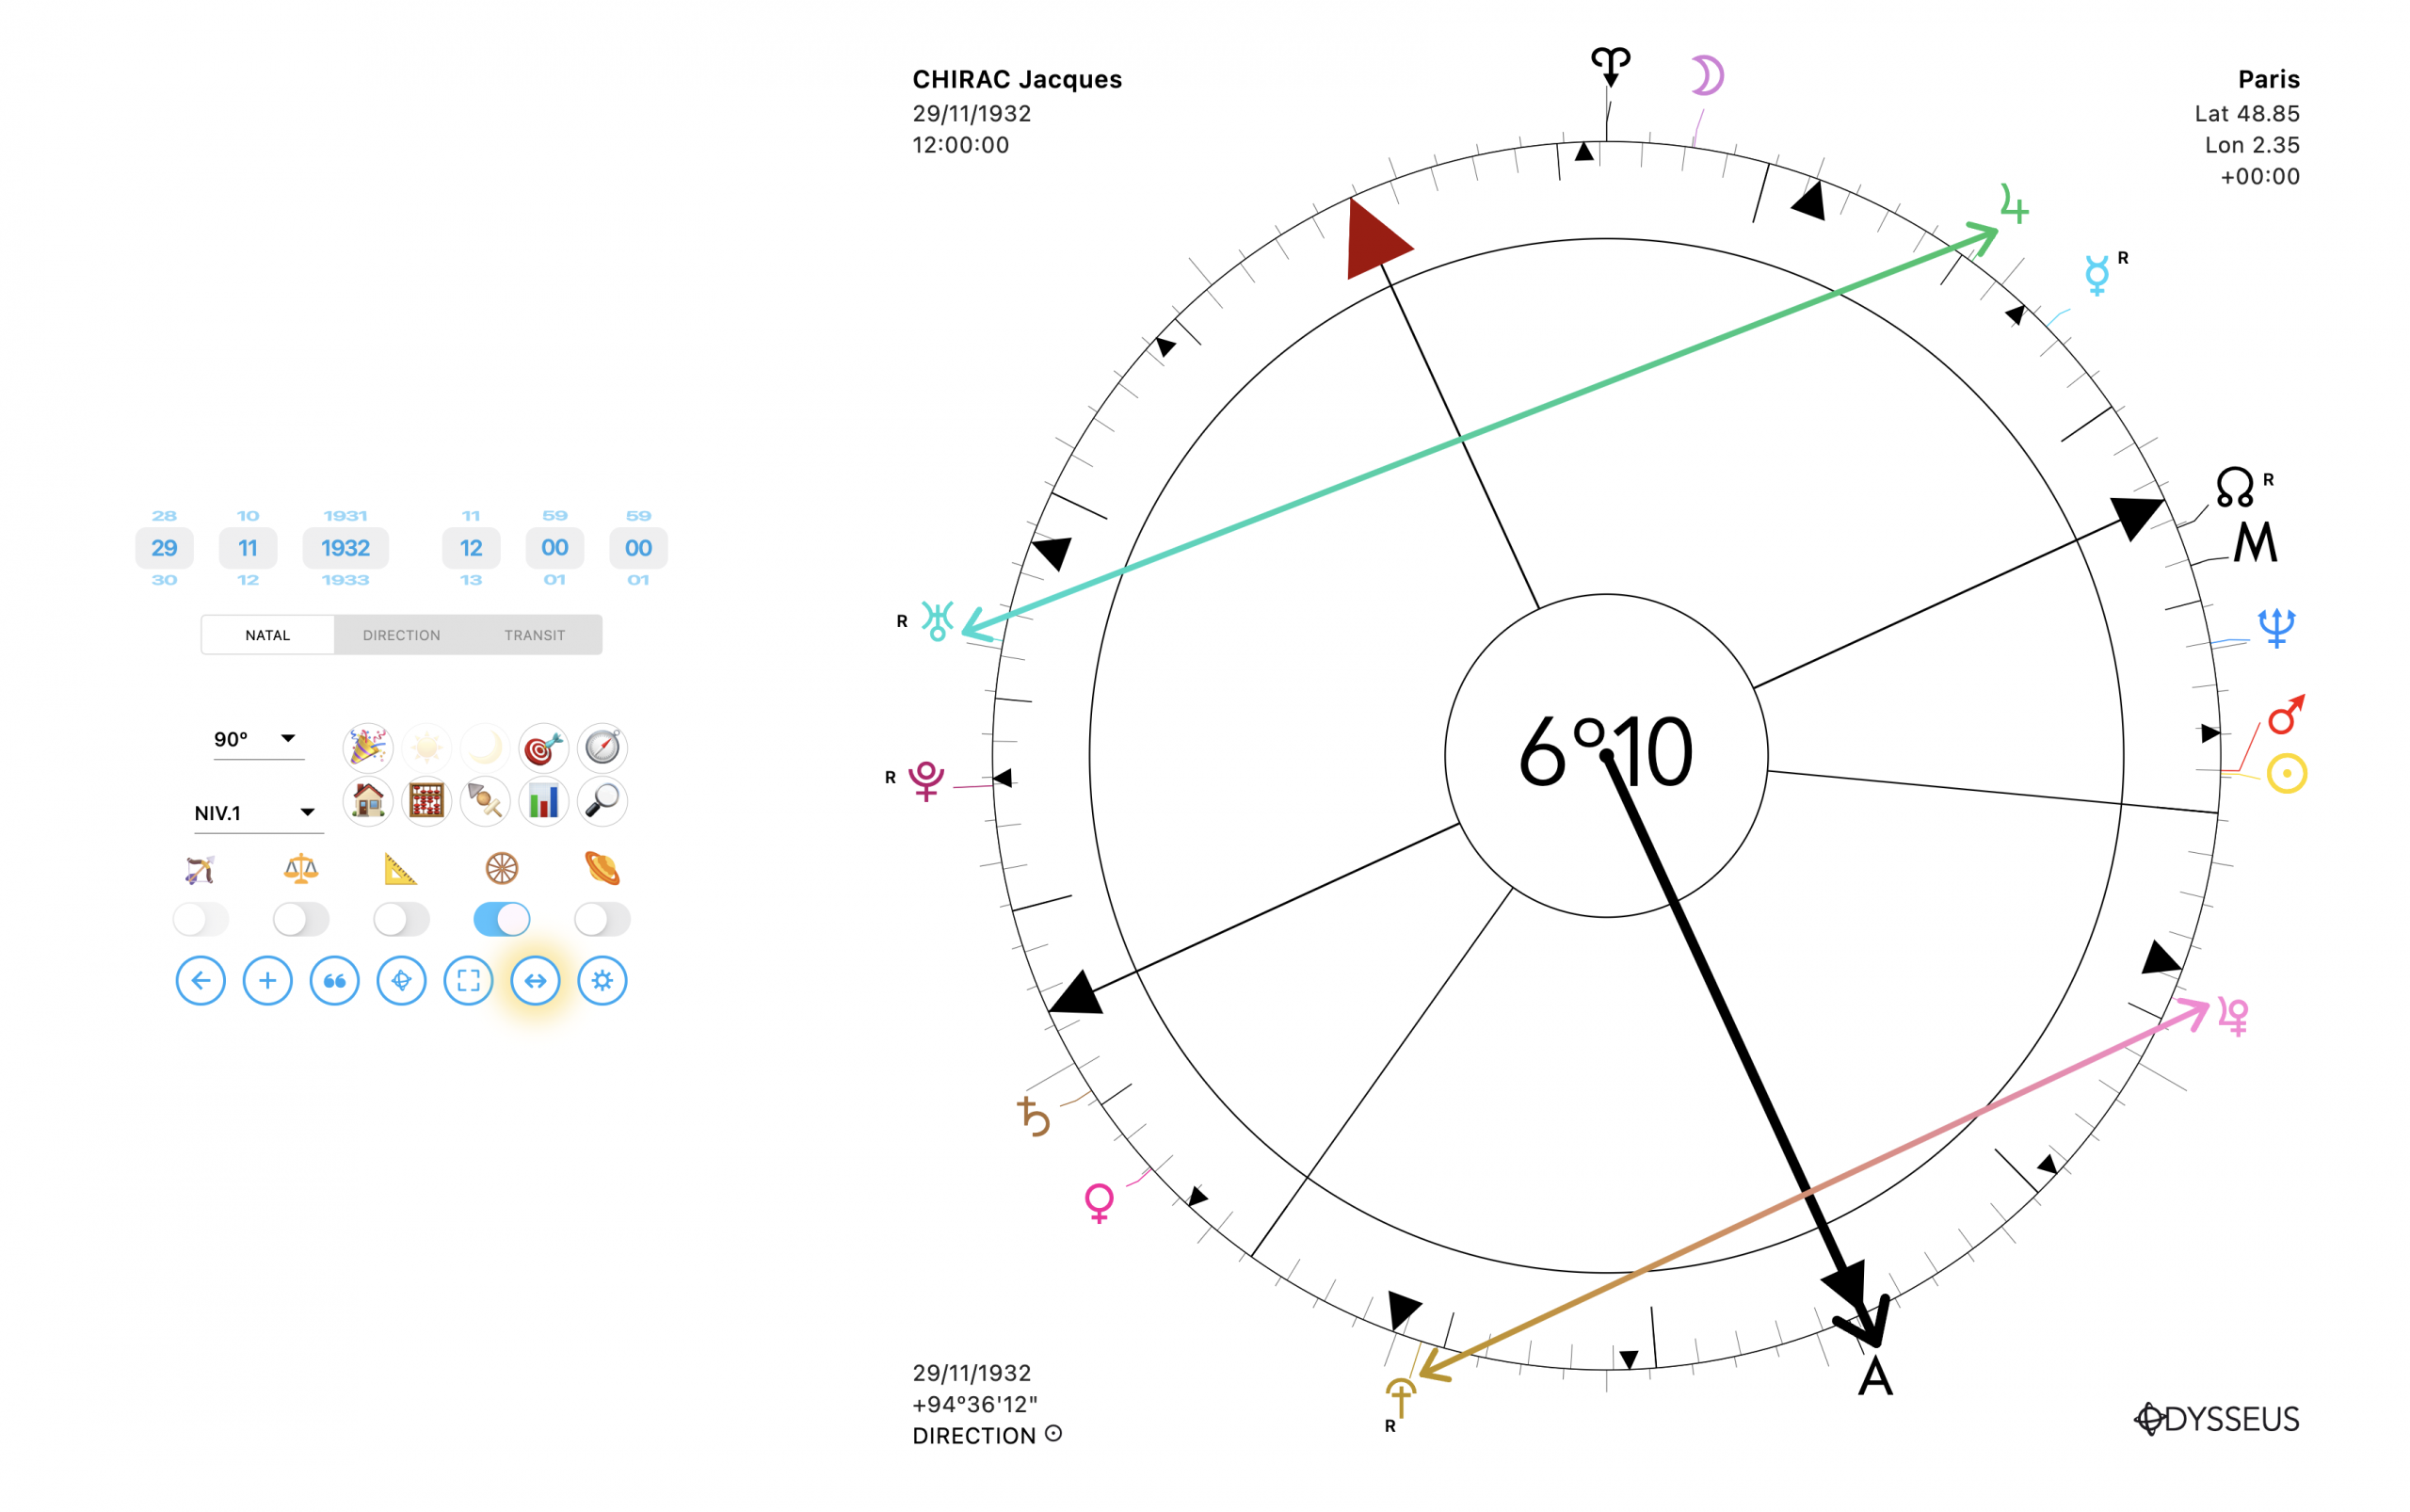
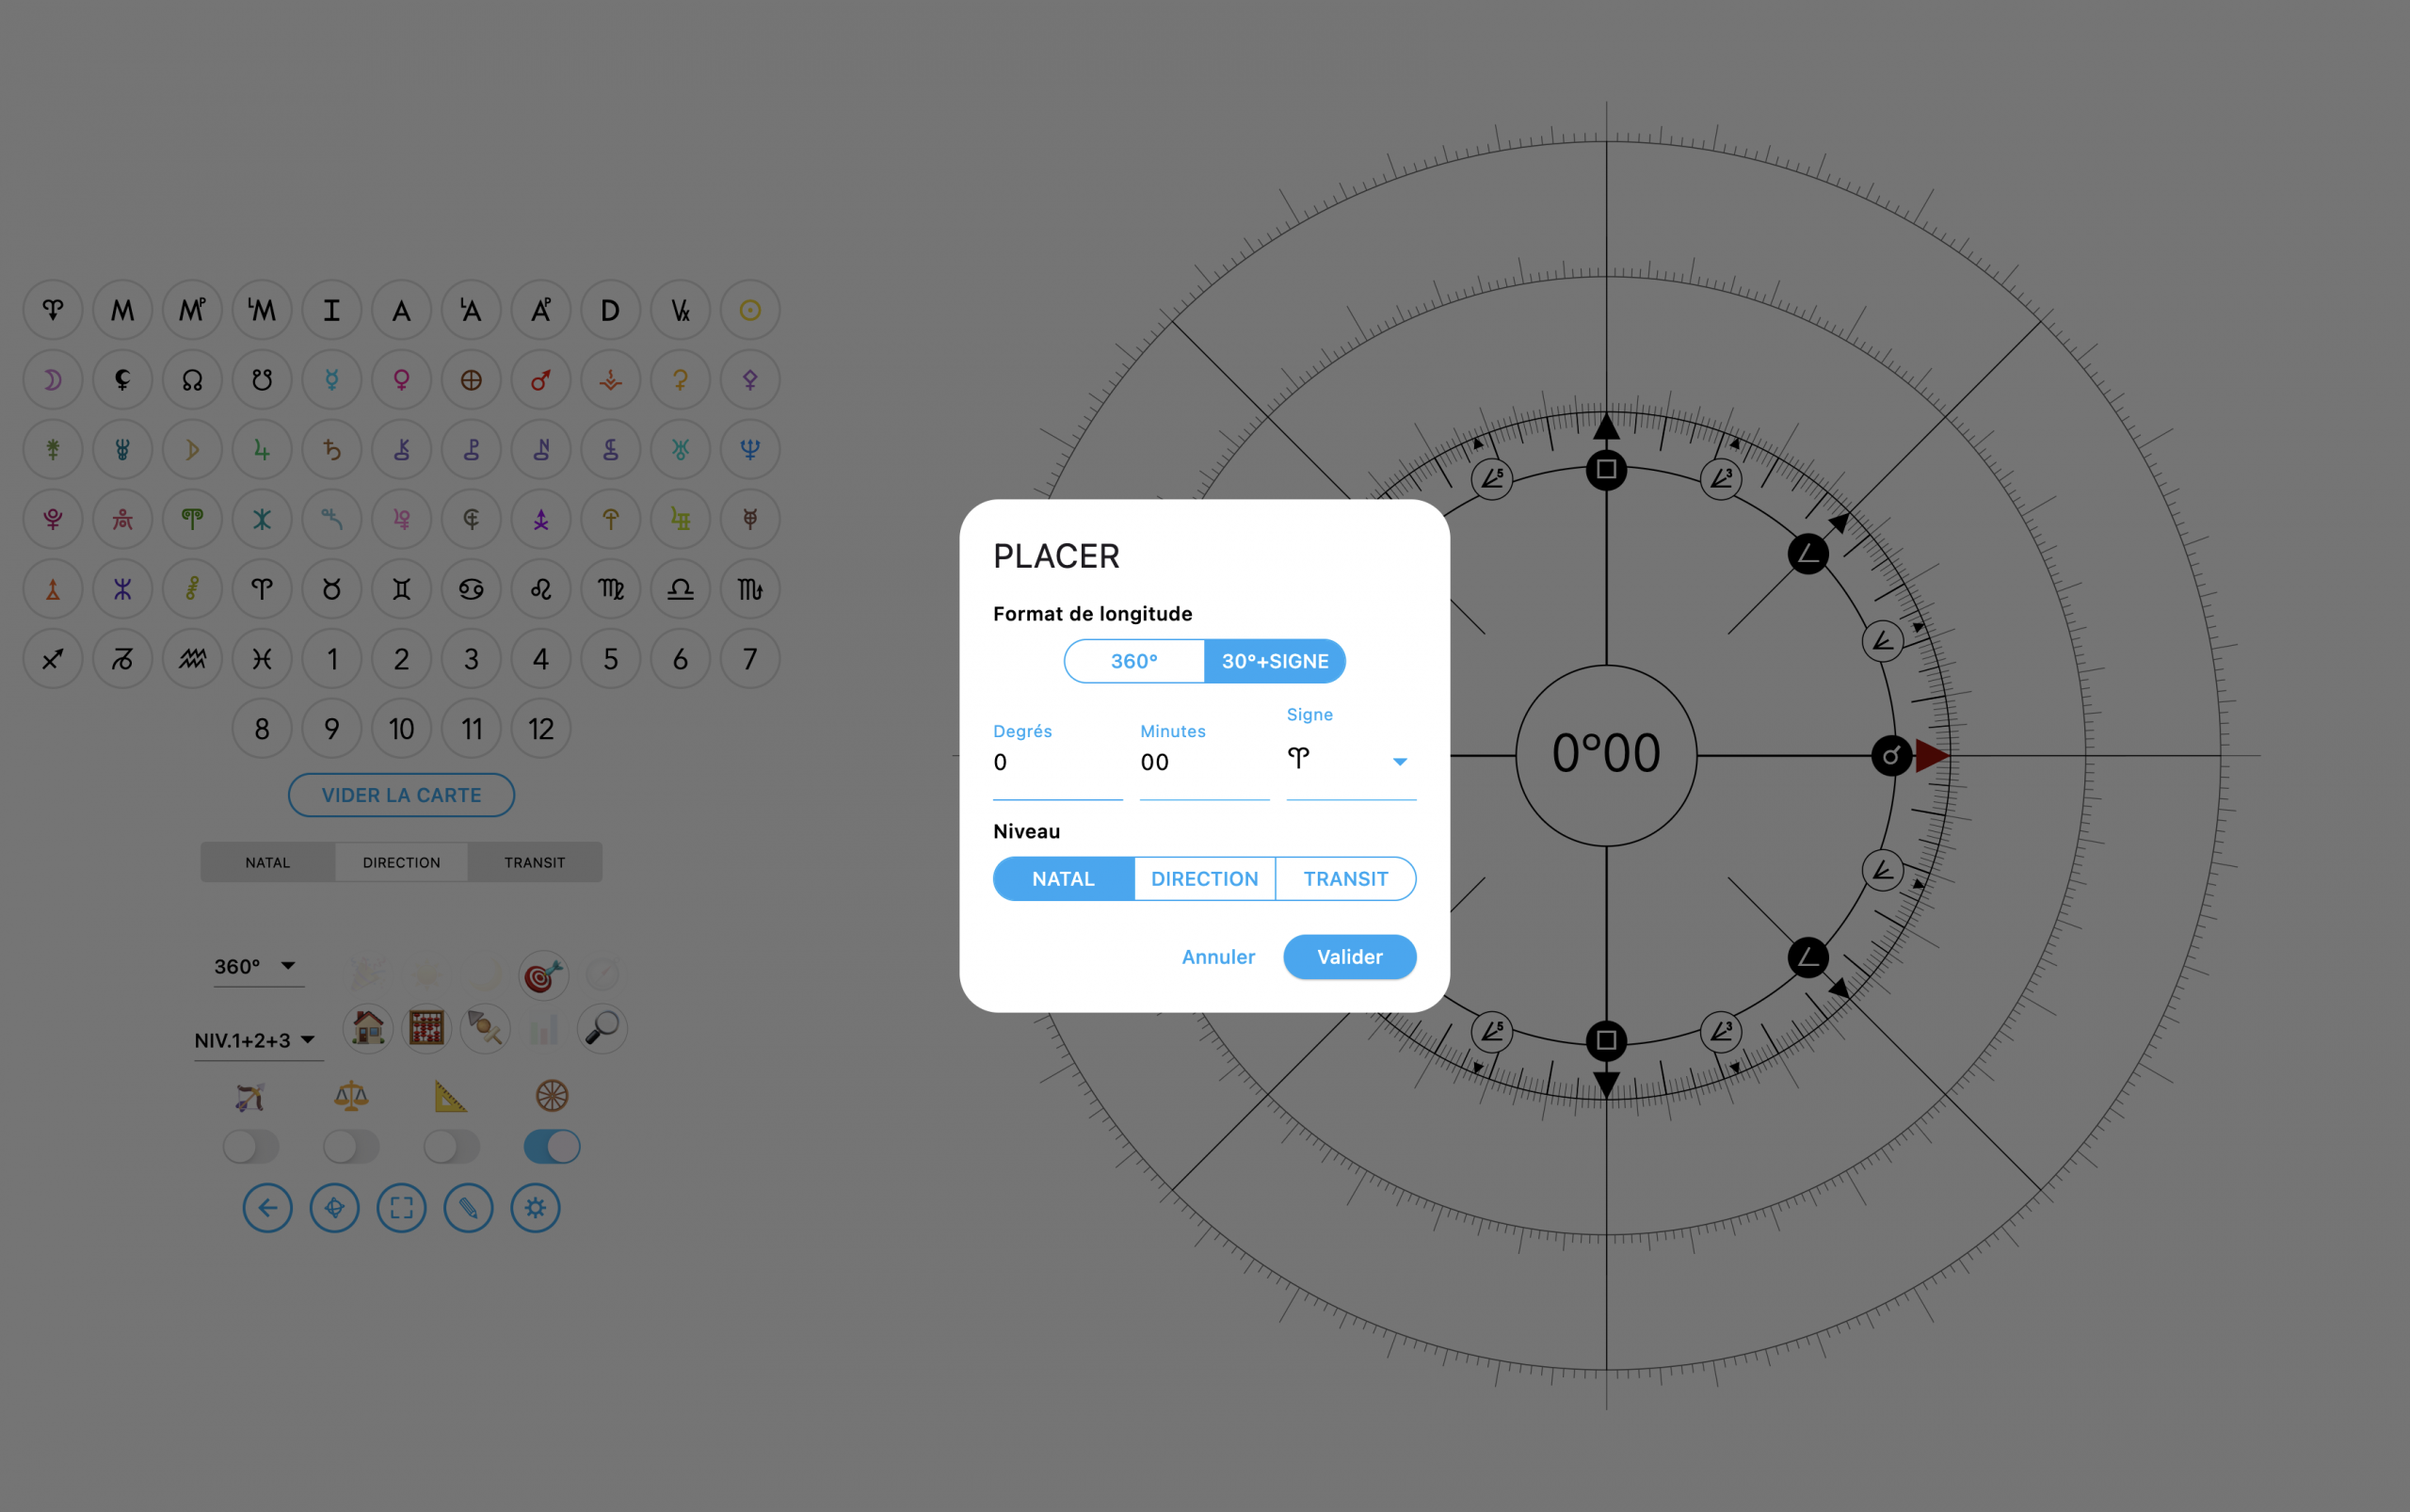
+ Another improvement I’d been wishing for: you know that by double-clicking the degrees in the center of the wheel, you can type the value to rotate the wheel to. Until now, it was always in absolute longitude, i.e. on 360º (or 90º, 22º30, etc.). But since dyscalculic folks like me always feel like jumping out the window when it comes to converting zodiac sign longitudes into absolute longitudes, I decided to add the option to enter values as 30º + sign. Way easier!

+ And since I’m practical, I added this too for placing planets on the composition page (long-press on 🔭, on the chart creation page):
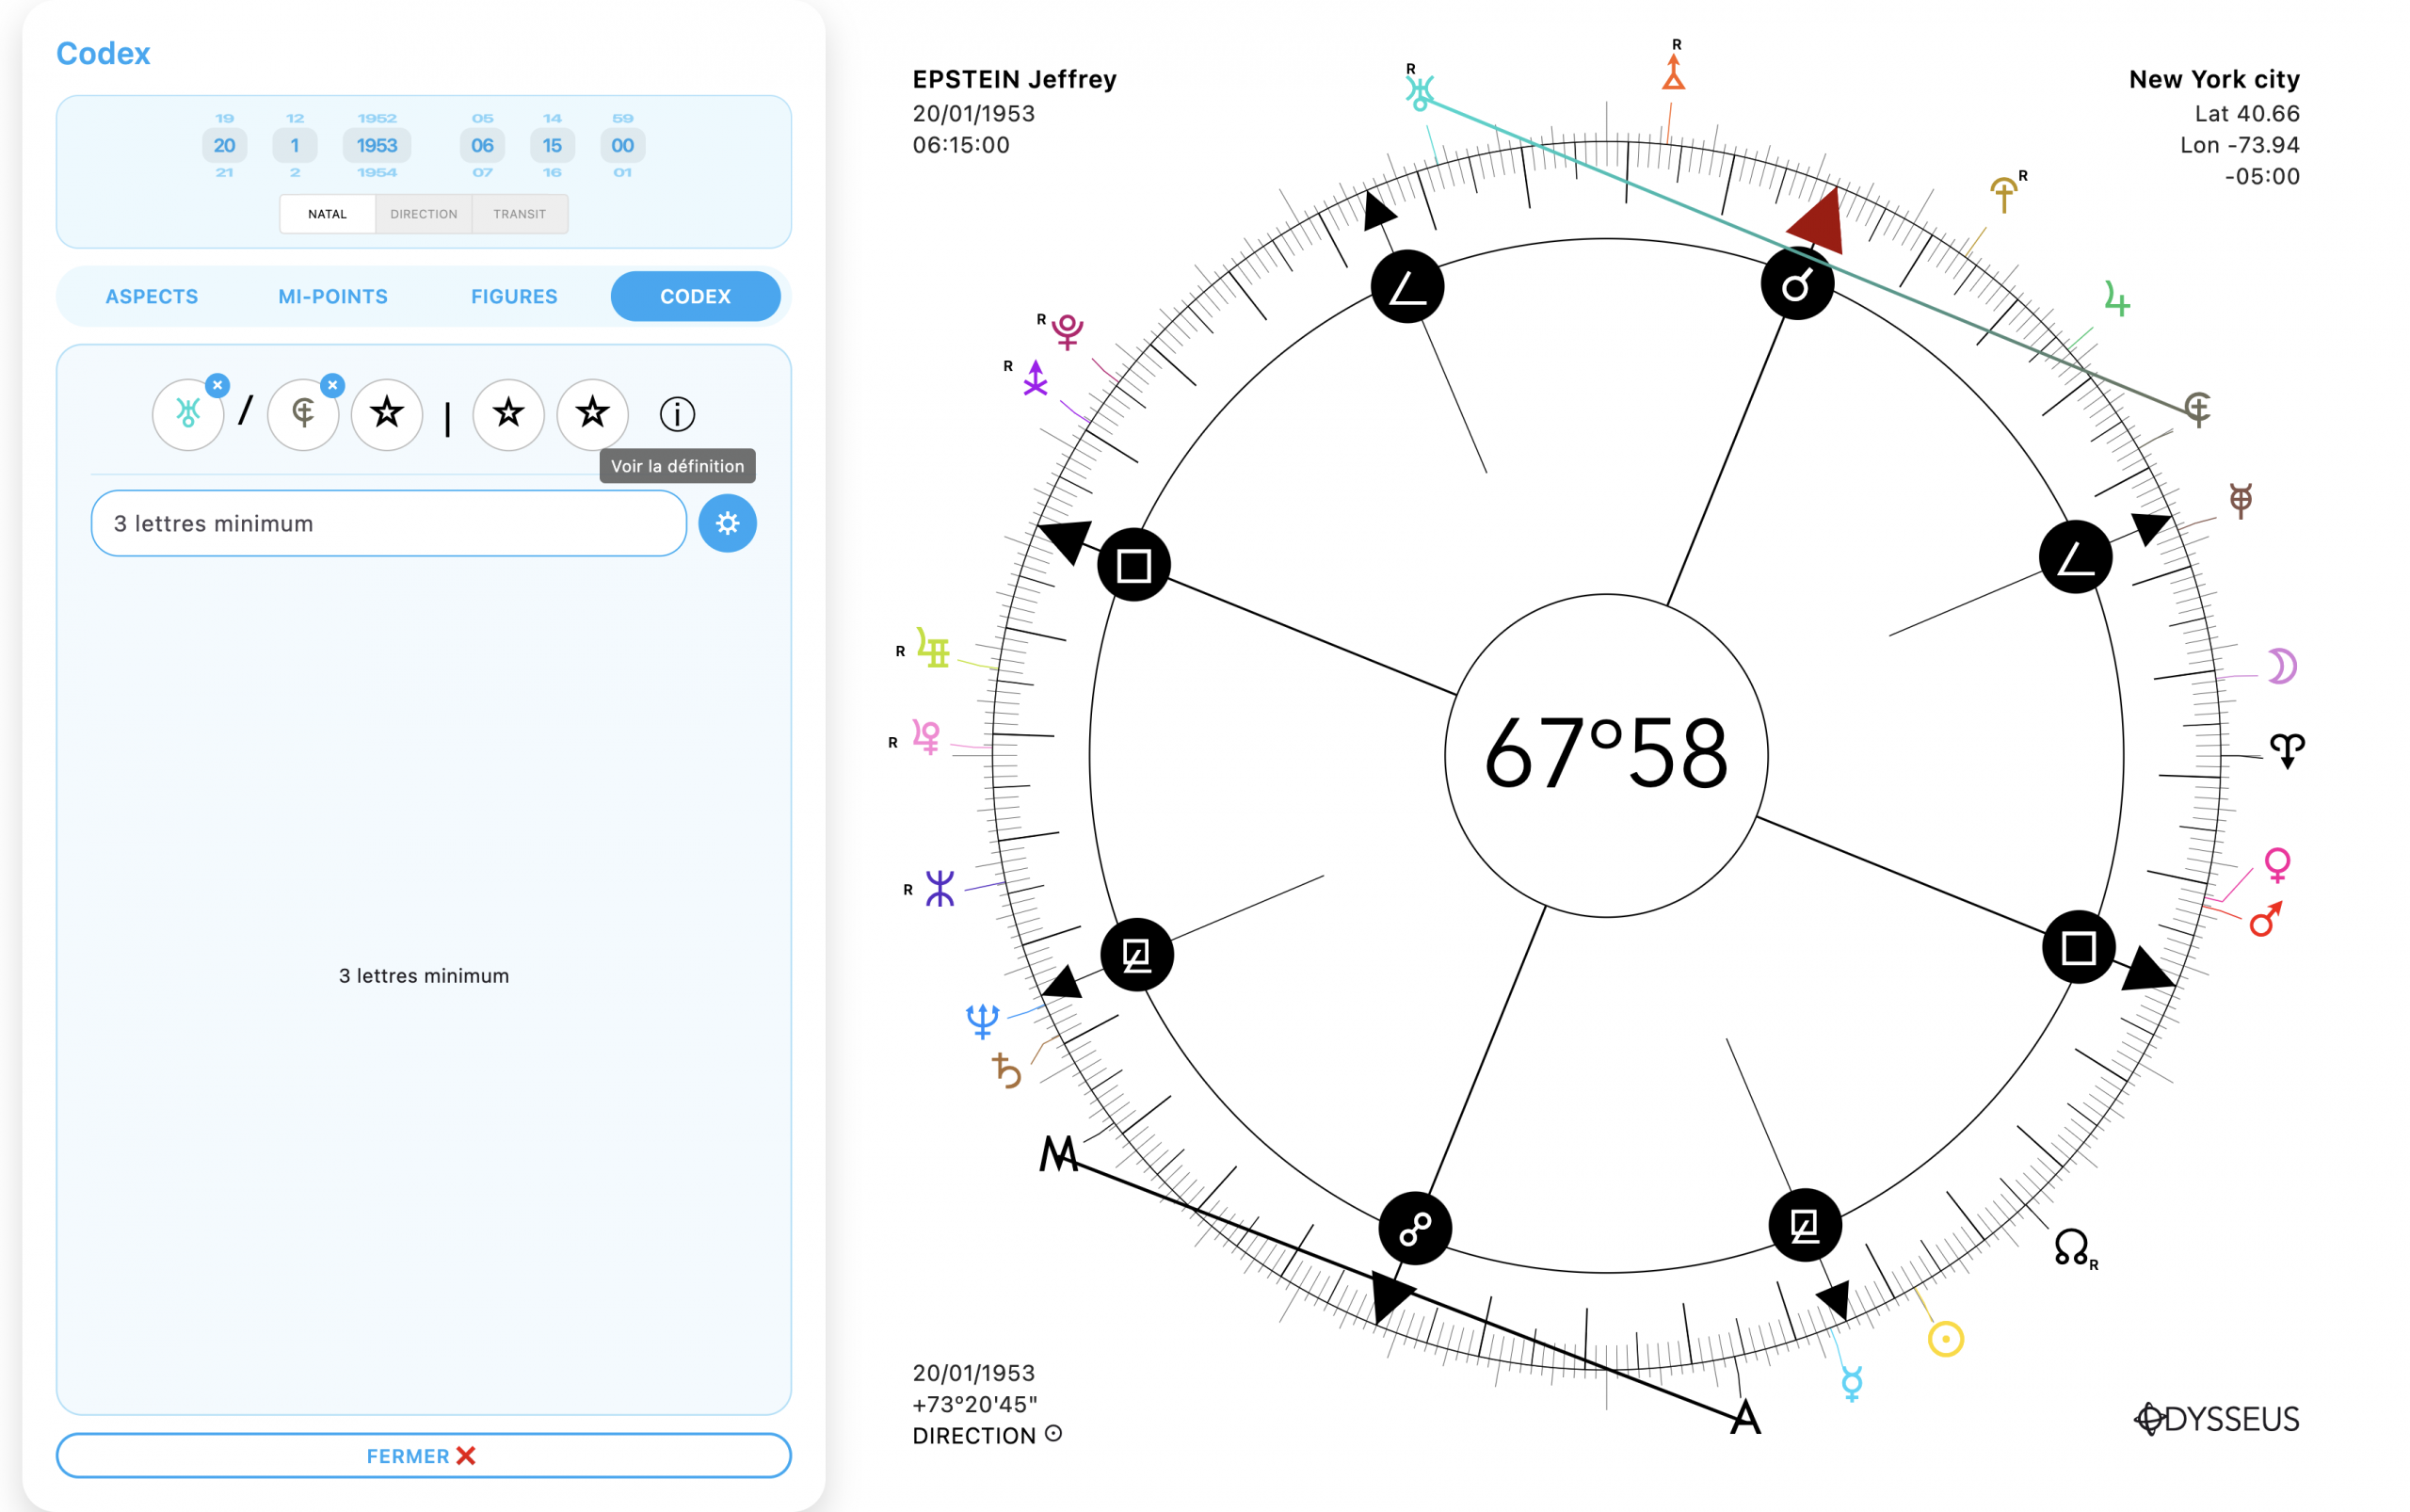
+ Another addition: in the Codex panel Ł, you now have a fourth tab called… well… Codex again, which lets you either use buttons to enter a planet, a midpoint, a planetary figure, a house in a system, and read its definition with the famous ⓘ.
When you click ⓘ, the definition still shows up at the bottom, but on the right side of the definition window you’ll find a ✏️ button that, when you click it…
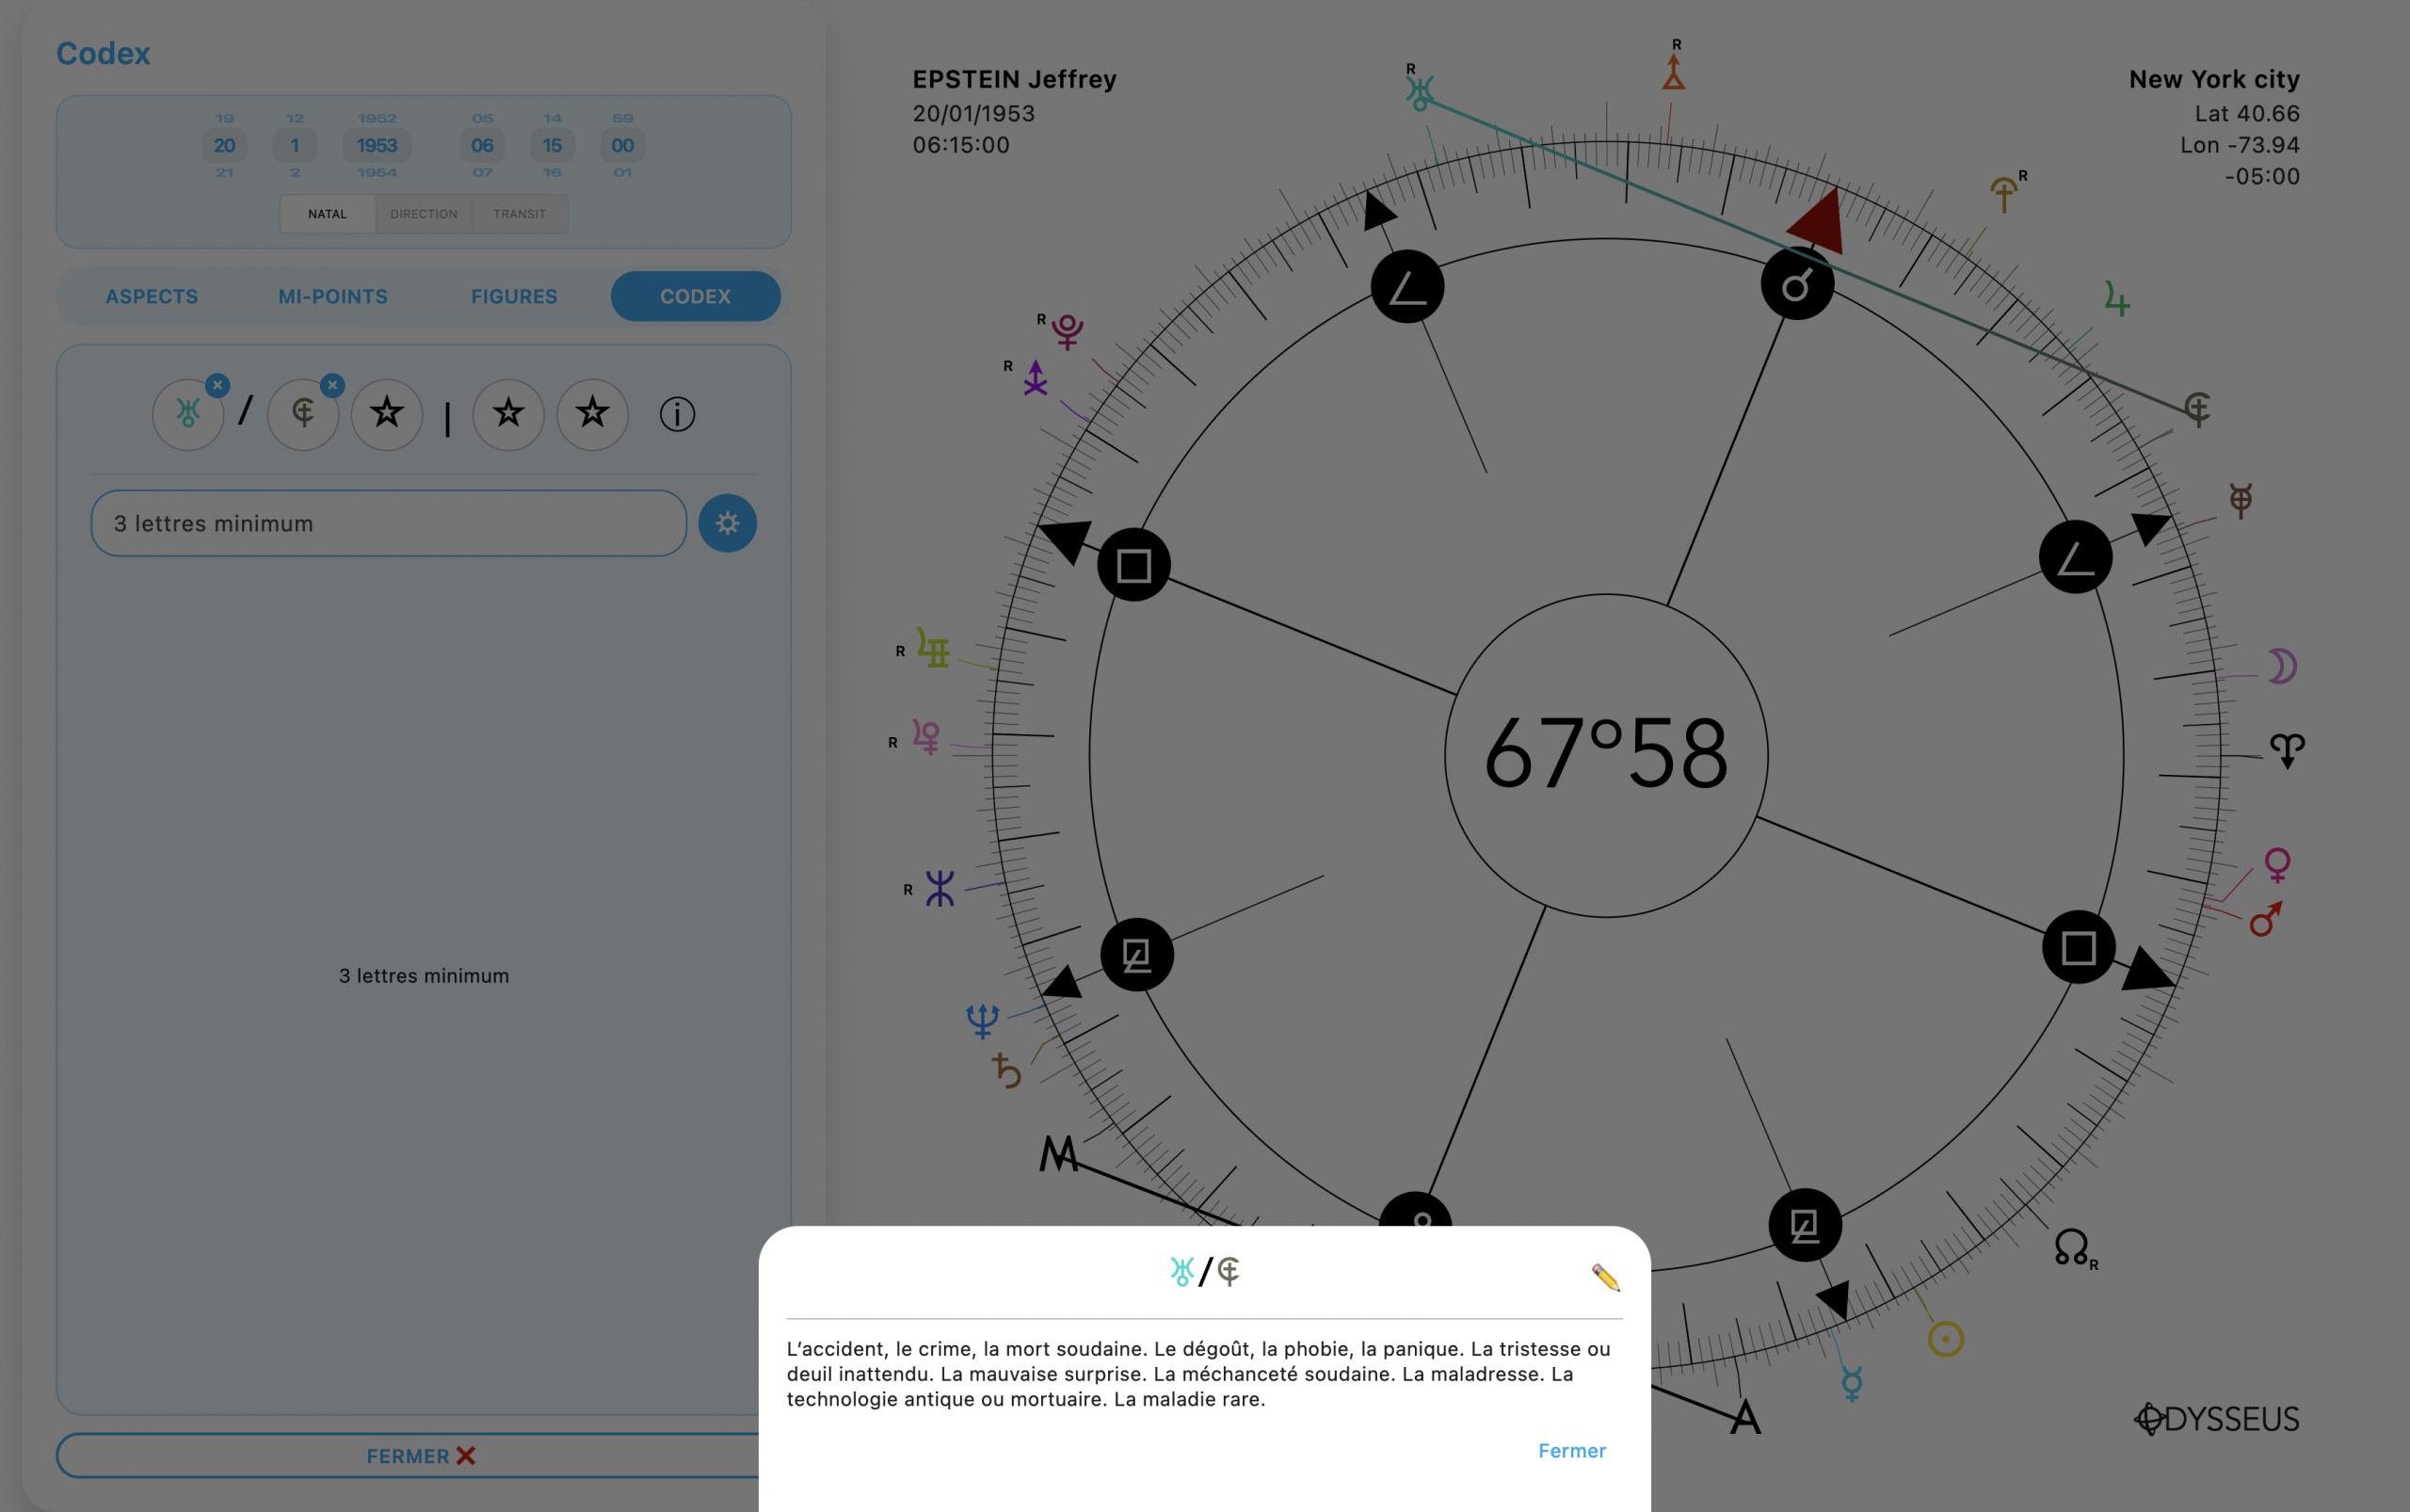
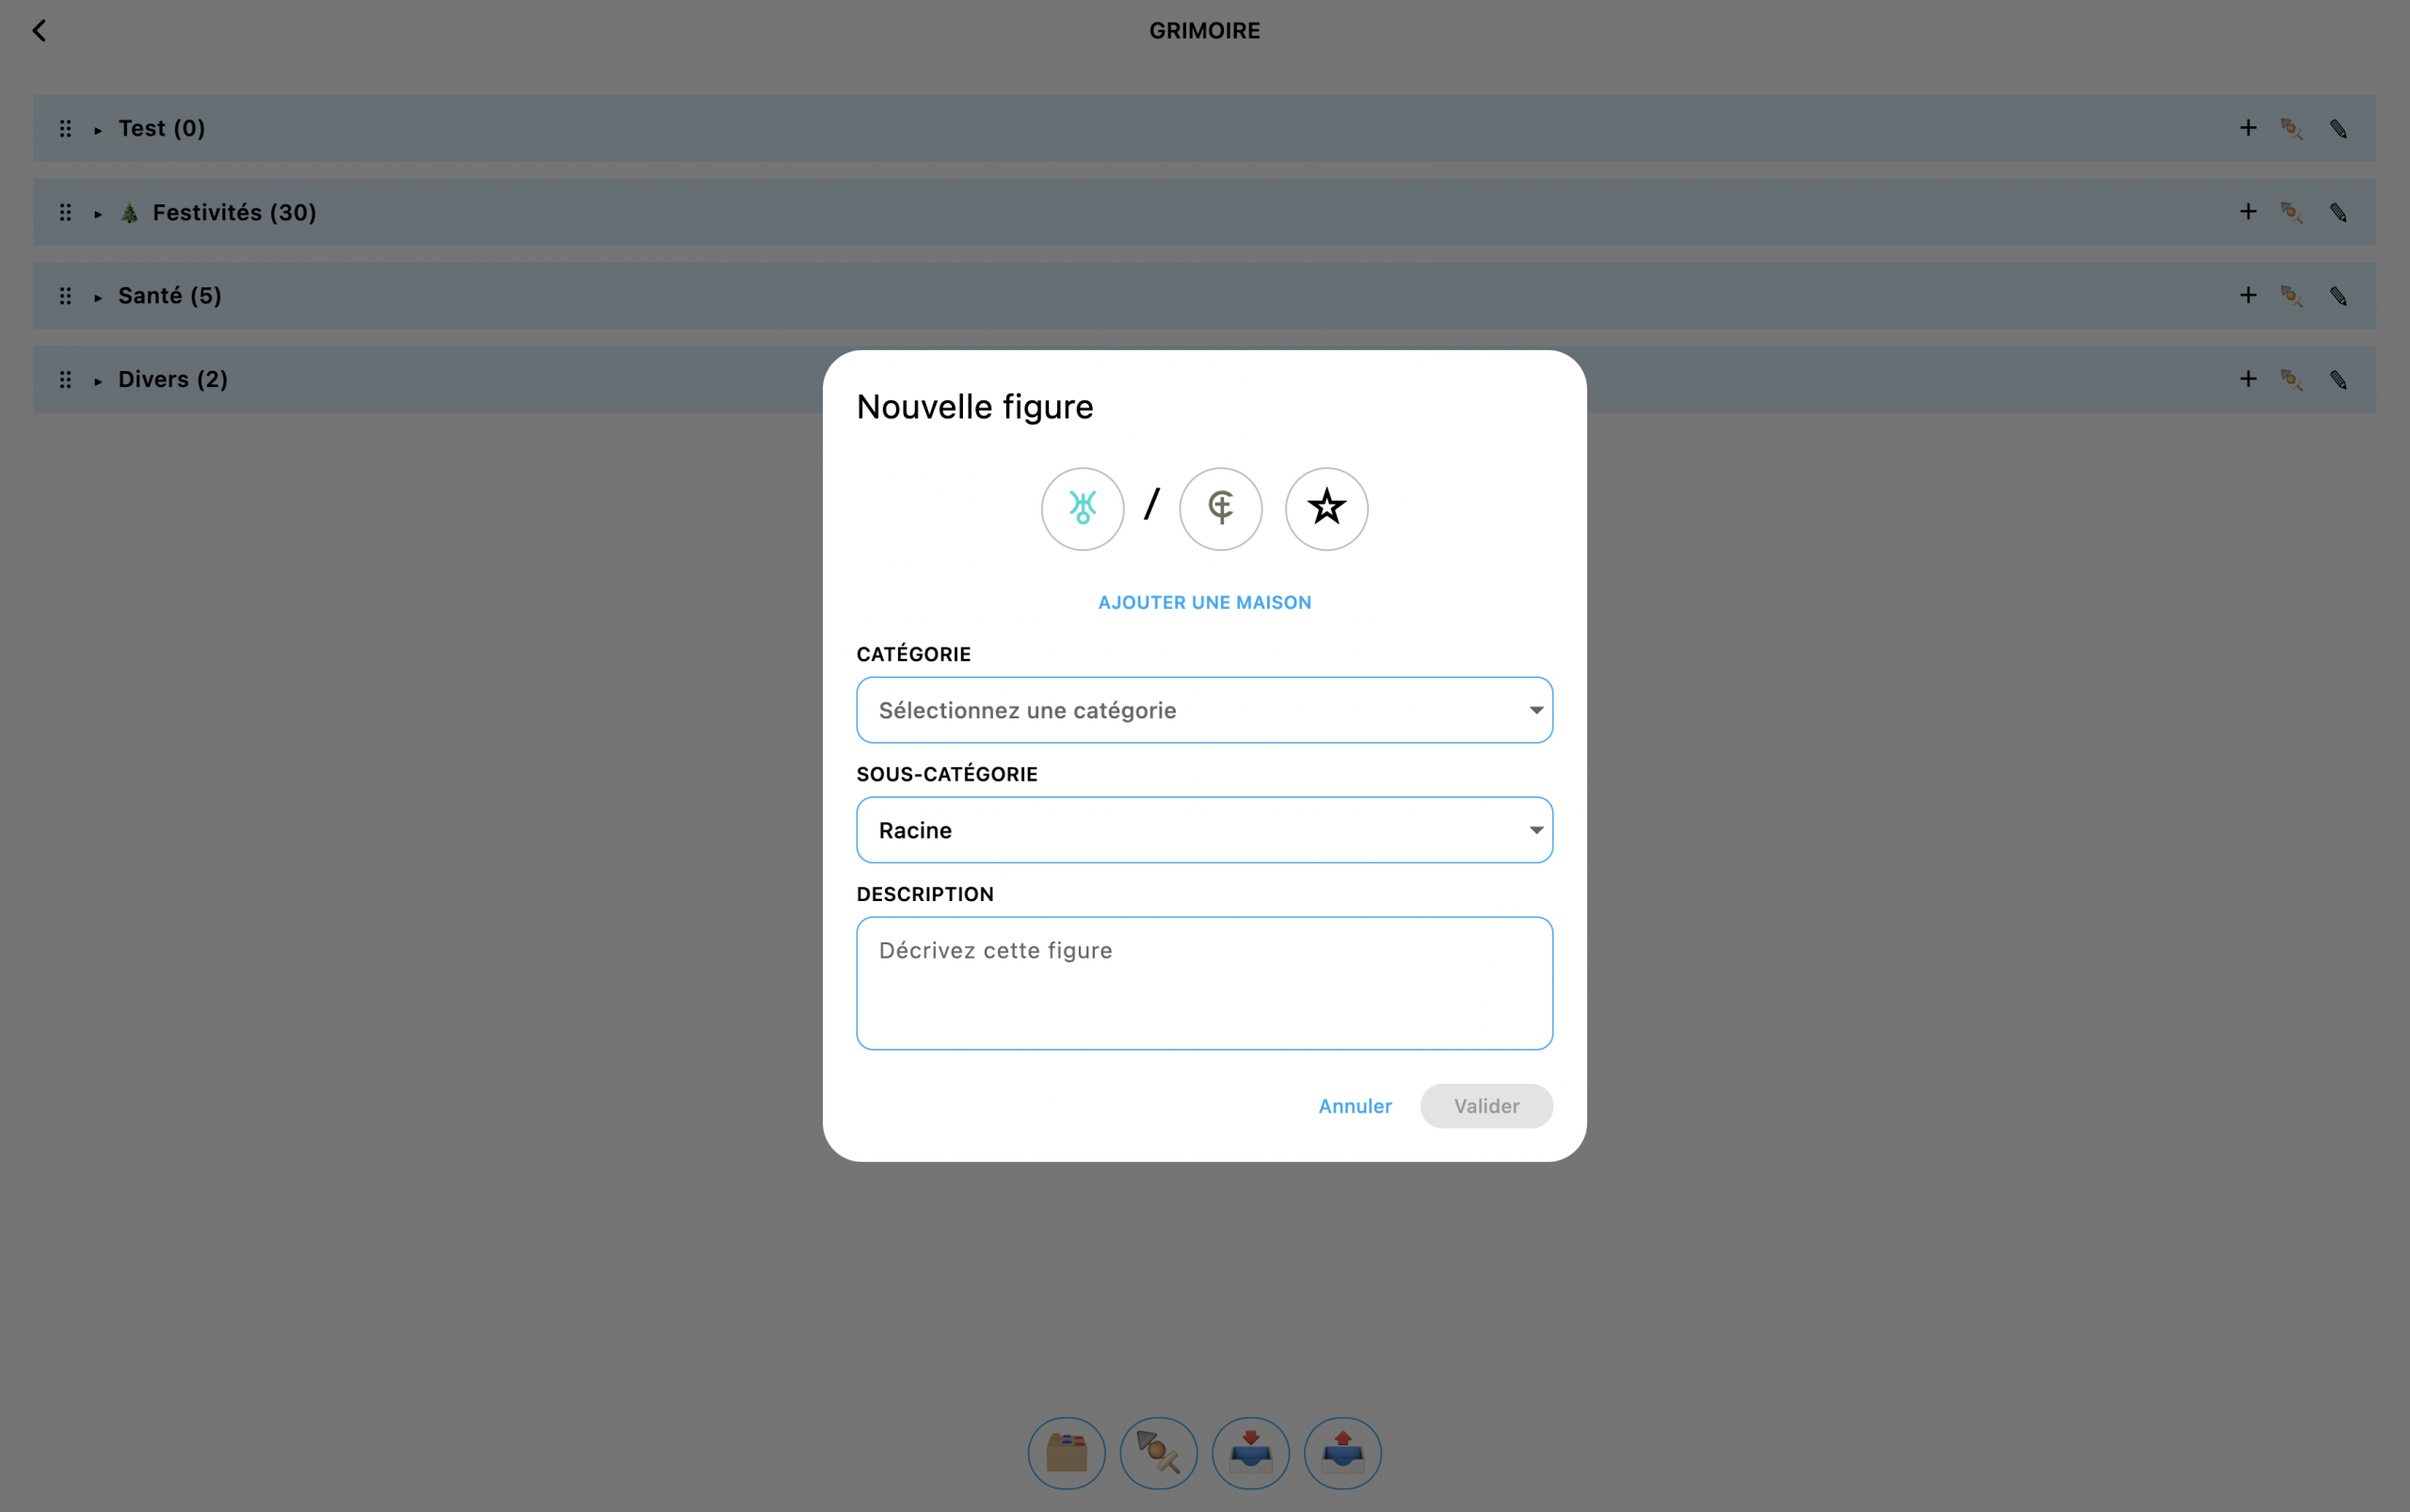
…takes you straight to the Grimoire to write things about that formula. And if you already have things written about it, well, you can simply edit to add or remove whatever you’ve already put there:
+ Also, in the same place, you’ll now find the search engine directly underneath the buttons ?. Eventually, my goal will be to get rid of the 🔎 button that takes you to the search engine and the grimoire. But we’ll deal with that later.
Now we get to the real new features.
+ As basic as it is essential for computers only: right-clicking on the wheel now lets you directly select the type of wheel and the levels you want to display. Now, on paper, this might seem useless because the two dropdown menus are there for that. But the point is that the Notes ❝ and Codex Ł panels hide them, and it becomes annoying to have to open and close the panel just to change the wheel display.
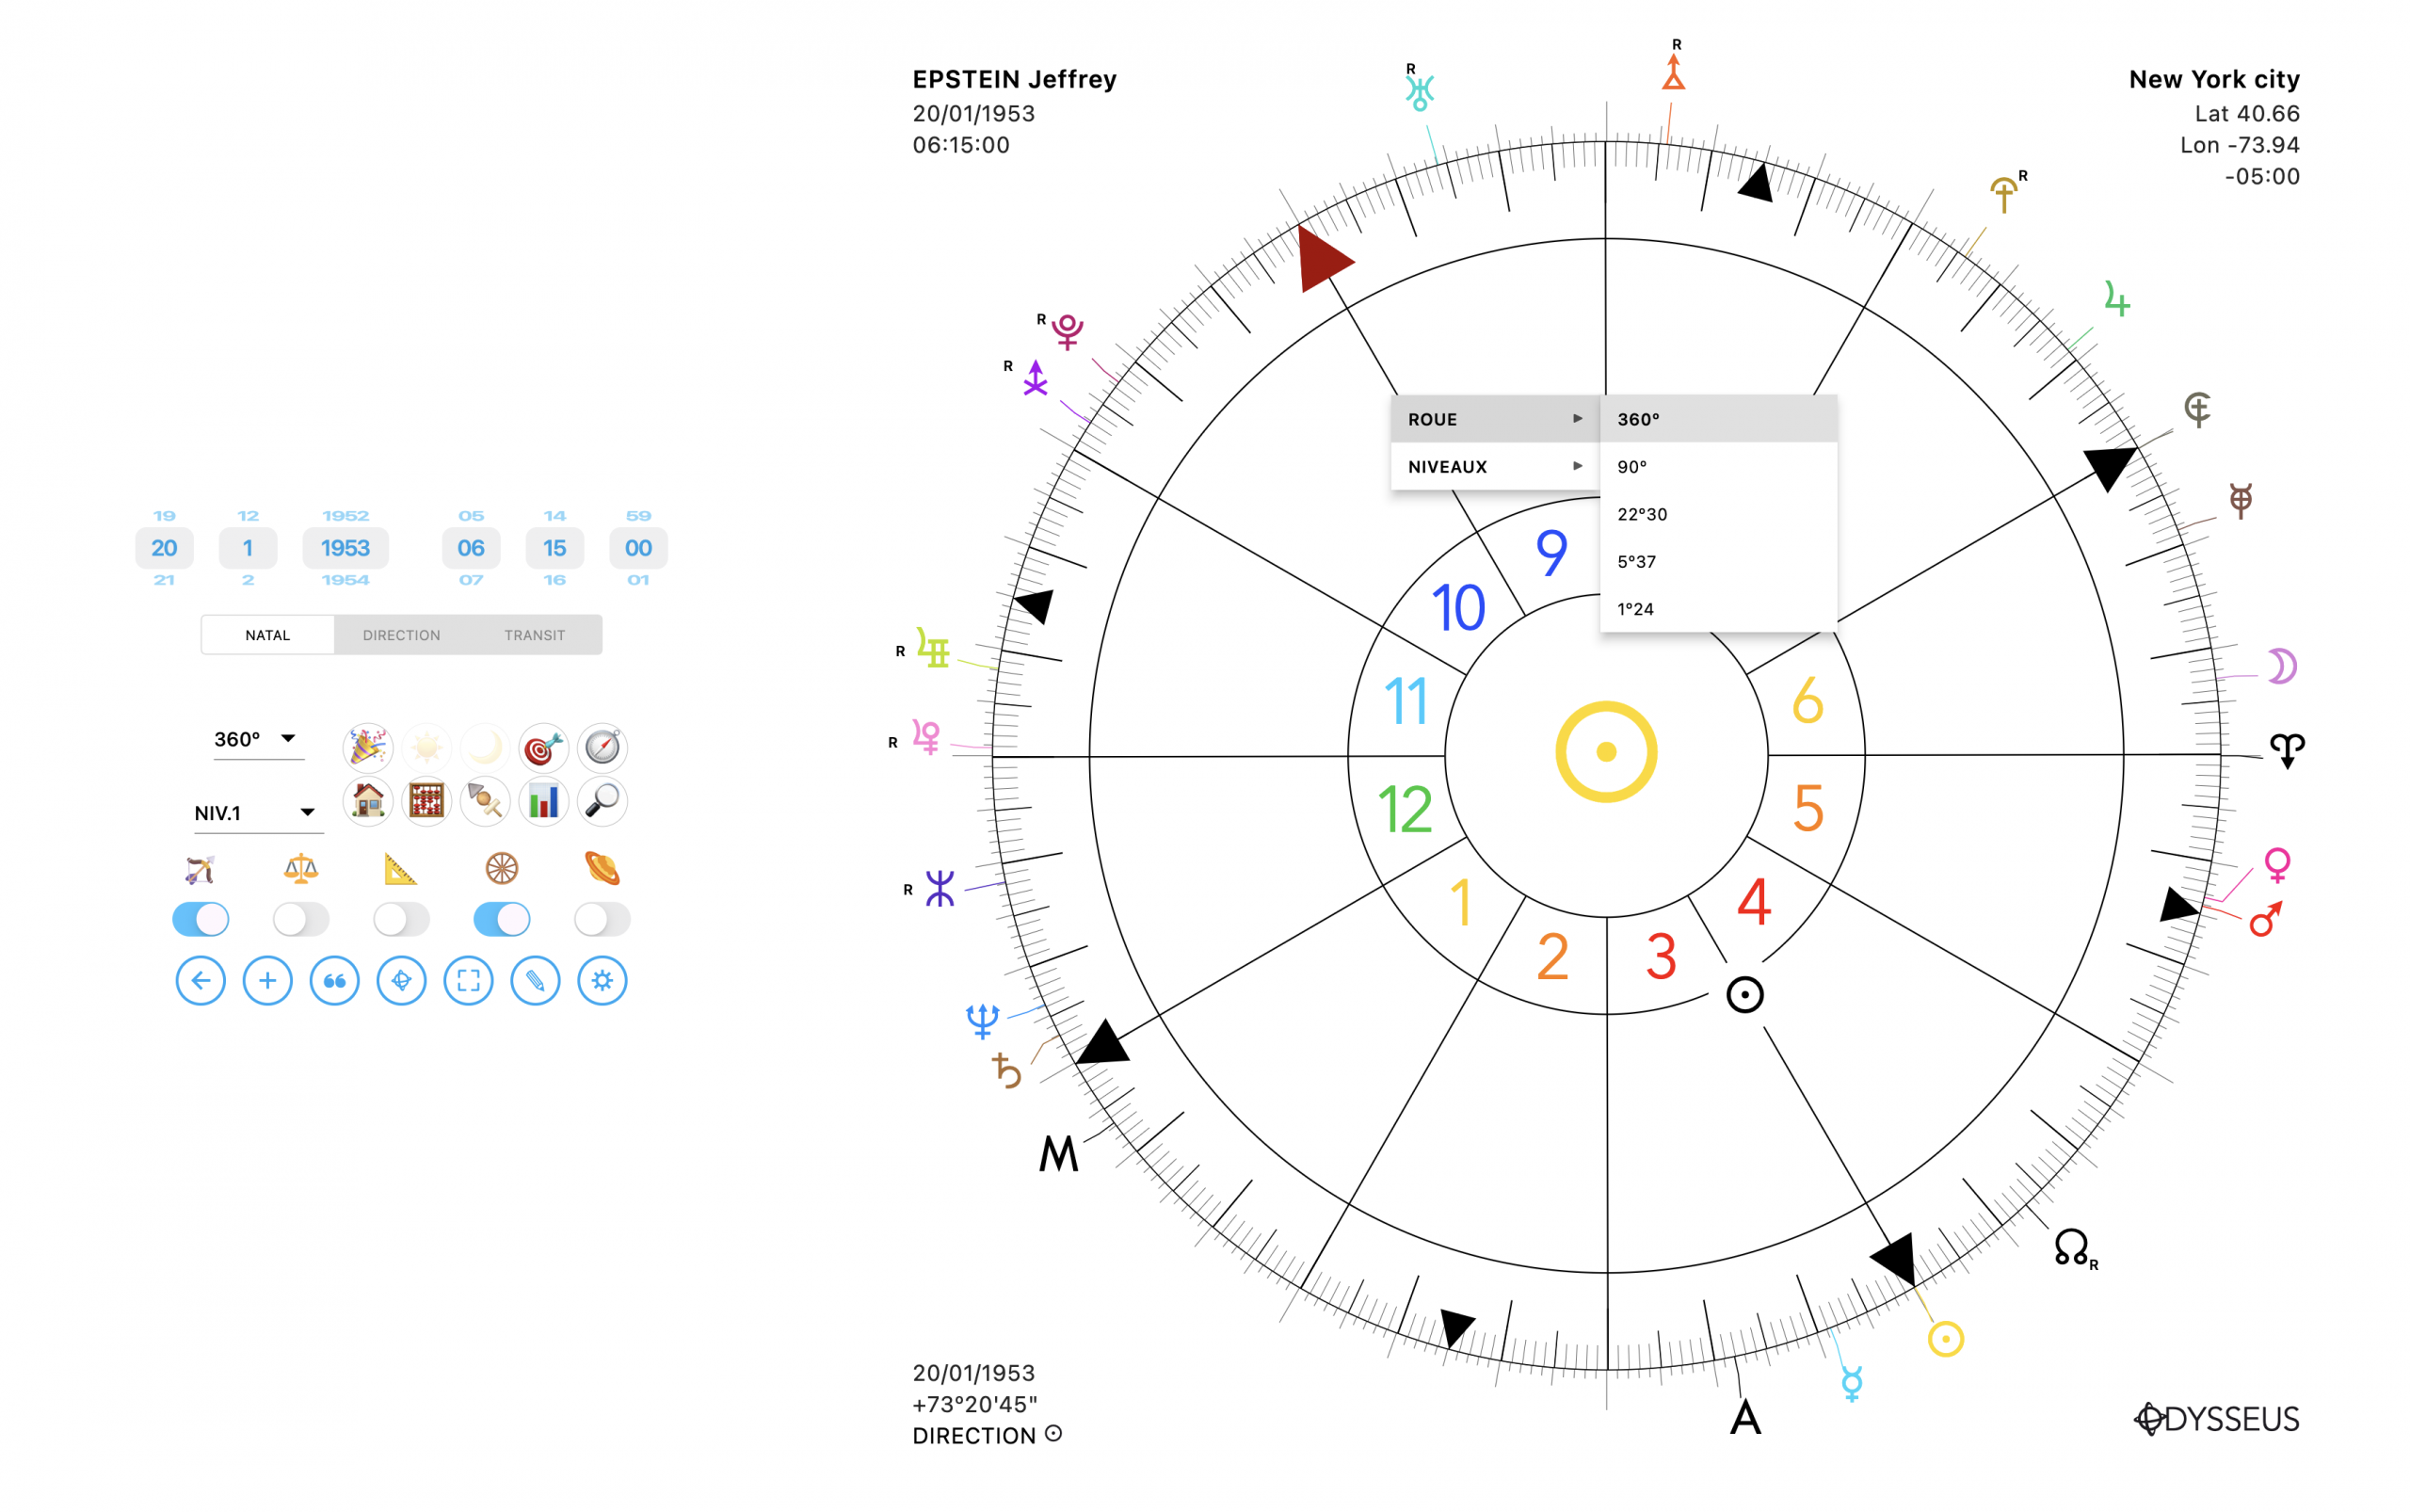
So now, when you’re inside one of those panels, you no longer need to close it to change the wheel layout.
+ And the intent behind this is simple: maximize the use of those panels. And for that, a big new feature (for me at least — I’m very happy, I’m self-satisfied… but I don’t do that in front of everyone…) : the Notes ❝ now have text formatting tools.
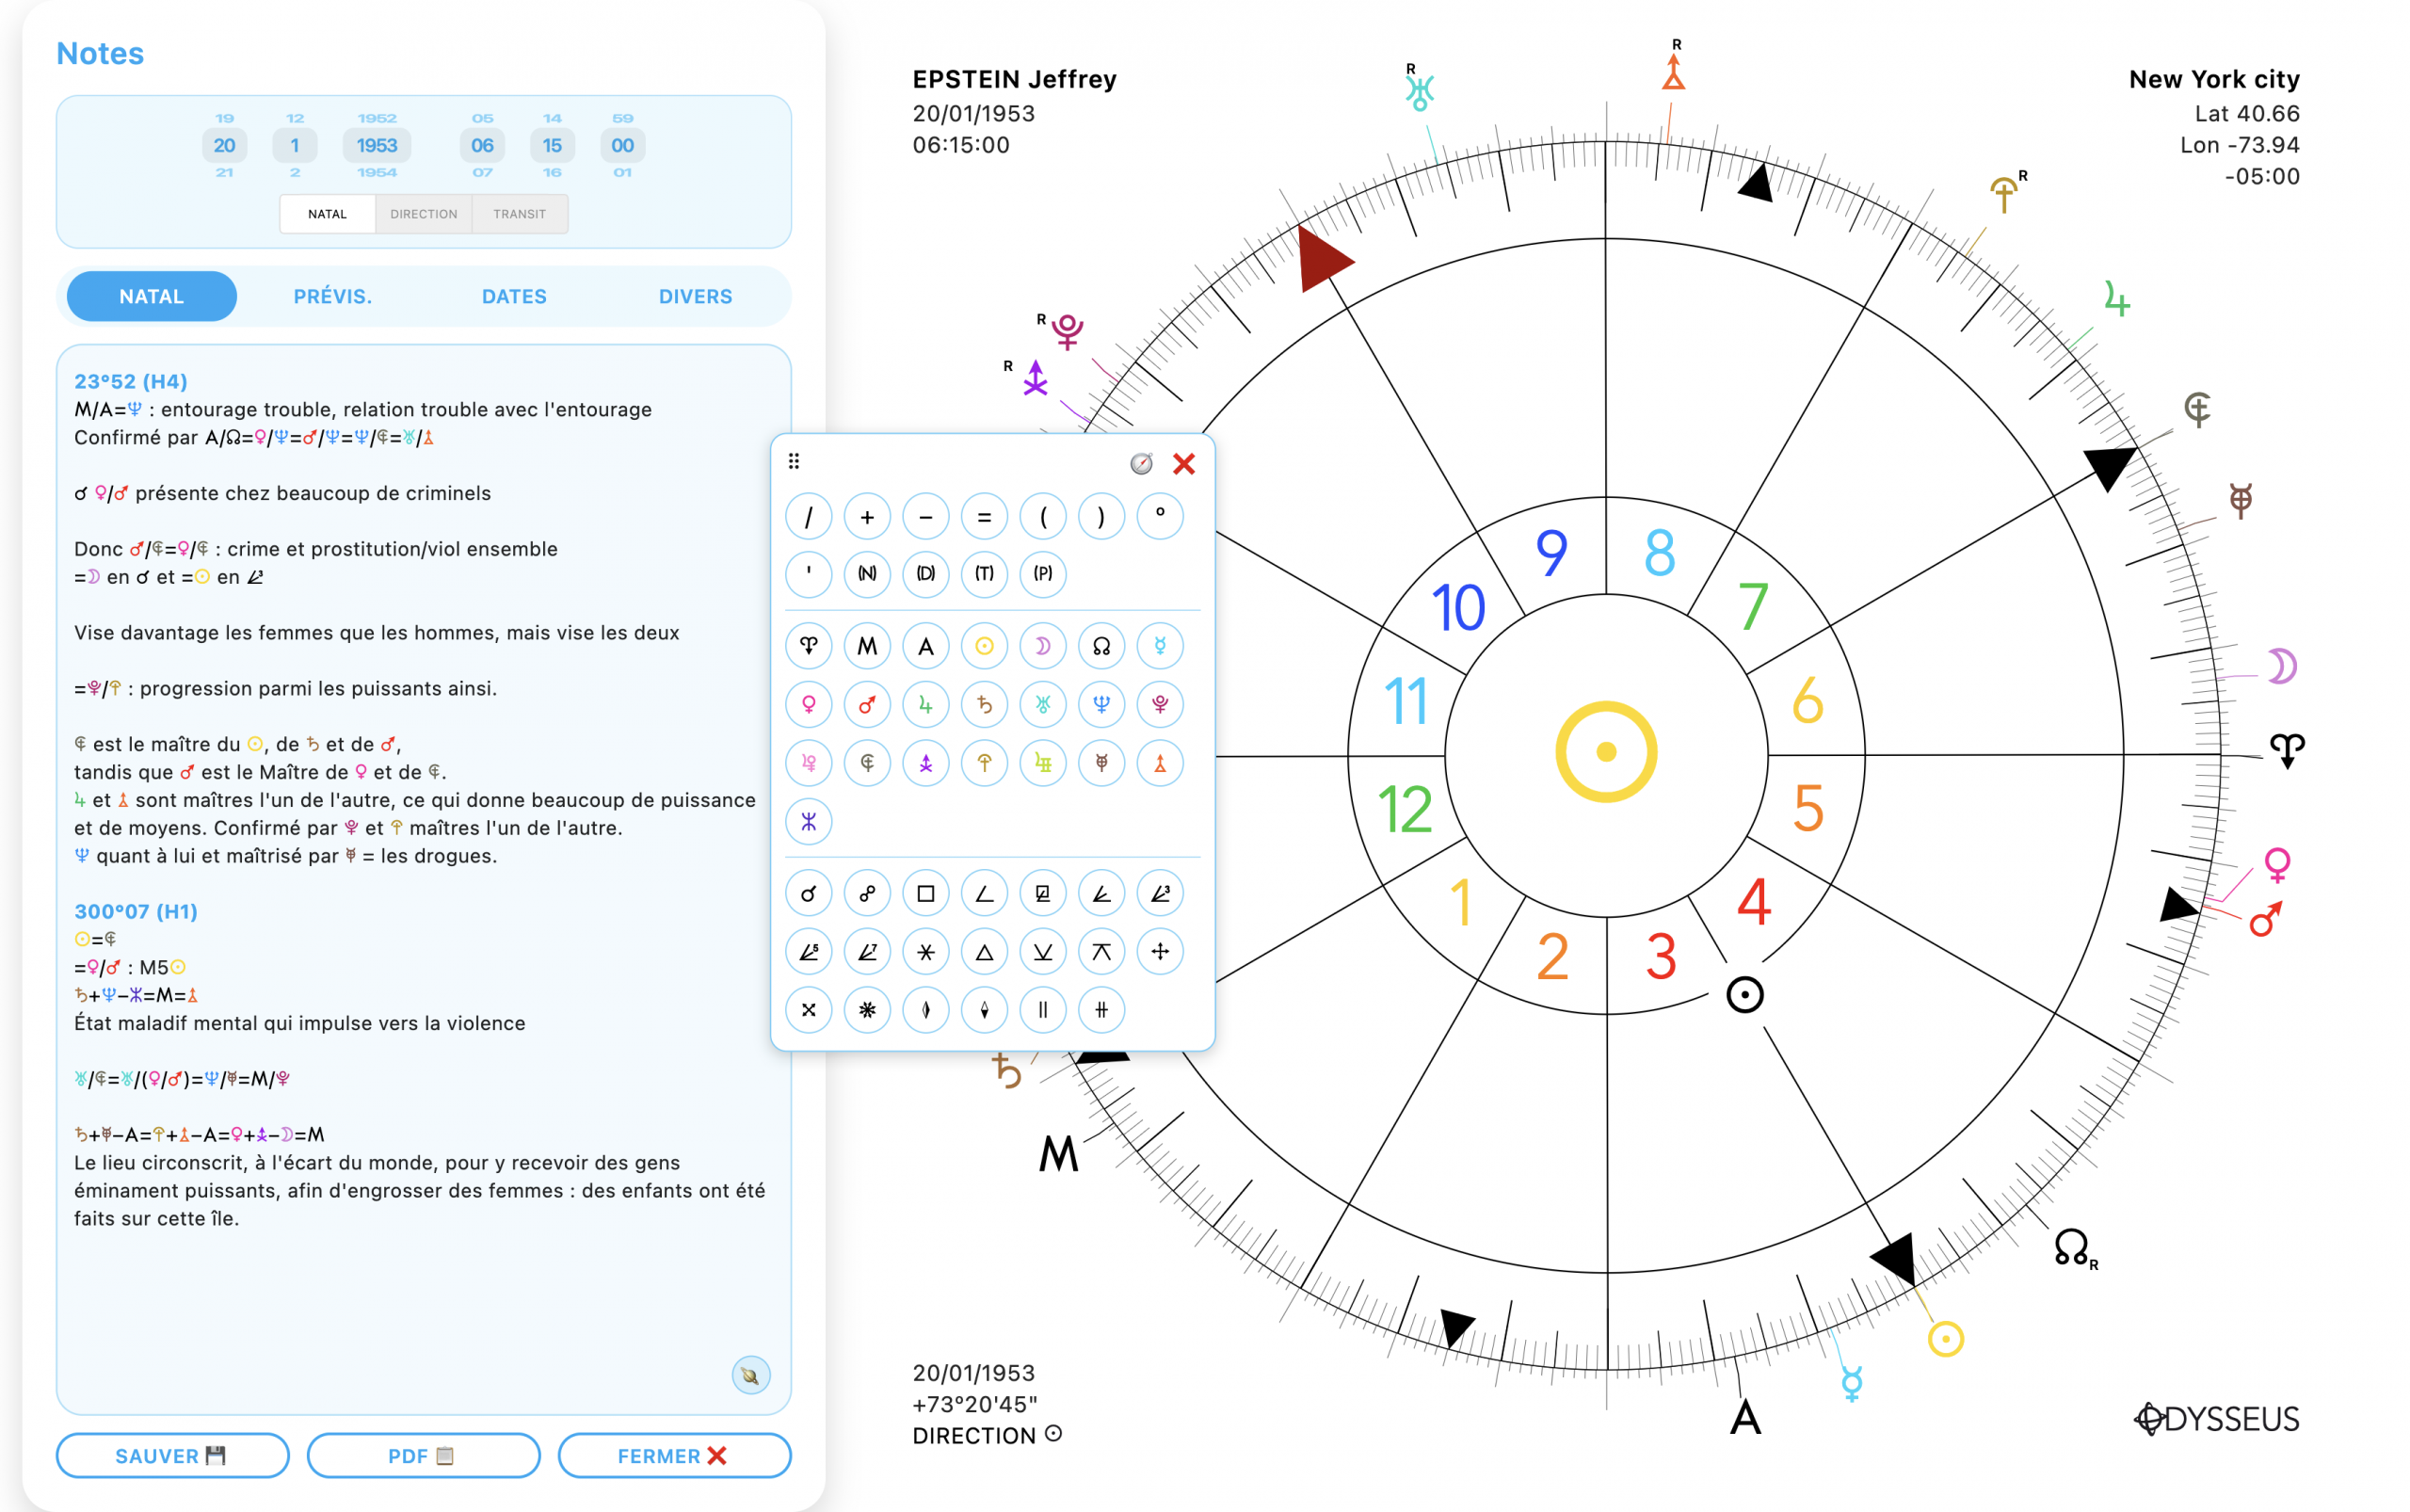
A 🪐 button lets you open a pop-up (computer only, while on mobile it’s handled by a scrolling bar at the bottom of the text area) that you can move around and that contains the planets and custom points visible on the wheel, but also a whole bunch of symbols like angles, signs, etc., enabling much nicer-looking text formatting. BUT! That’s not all…
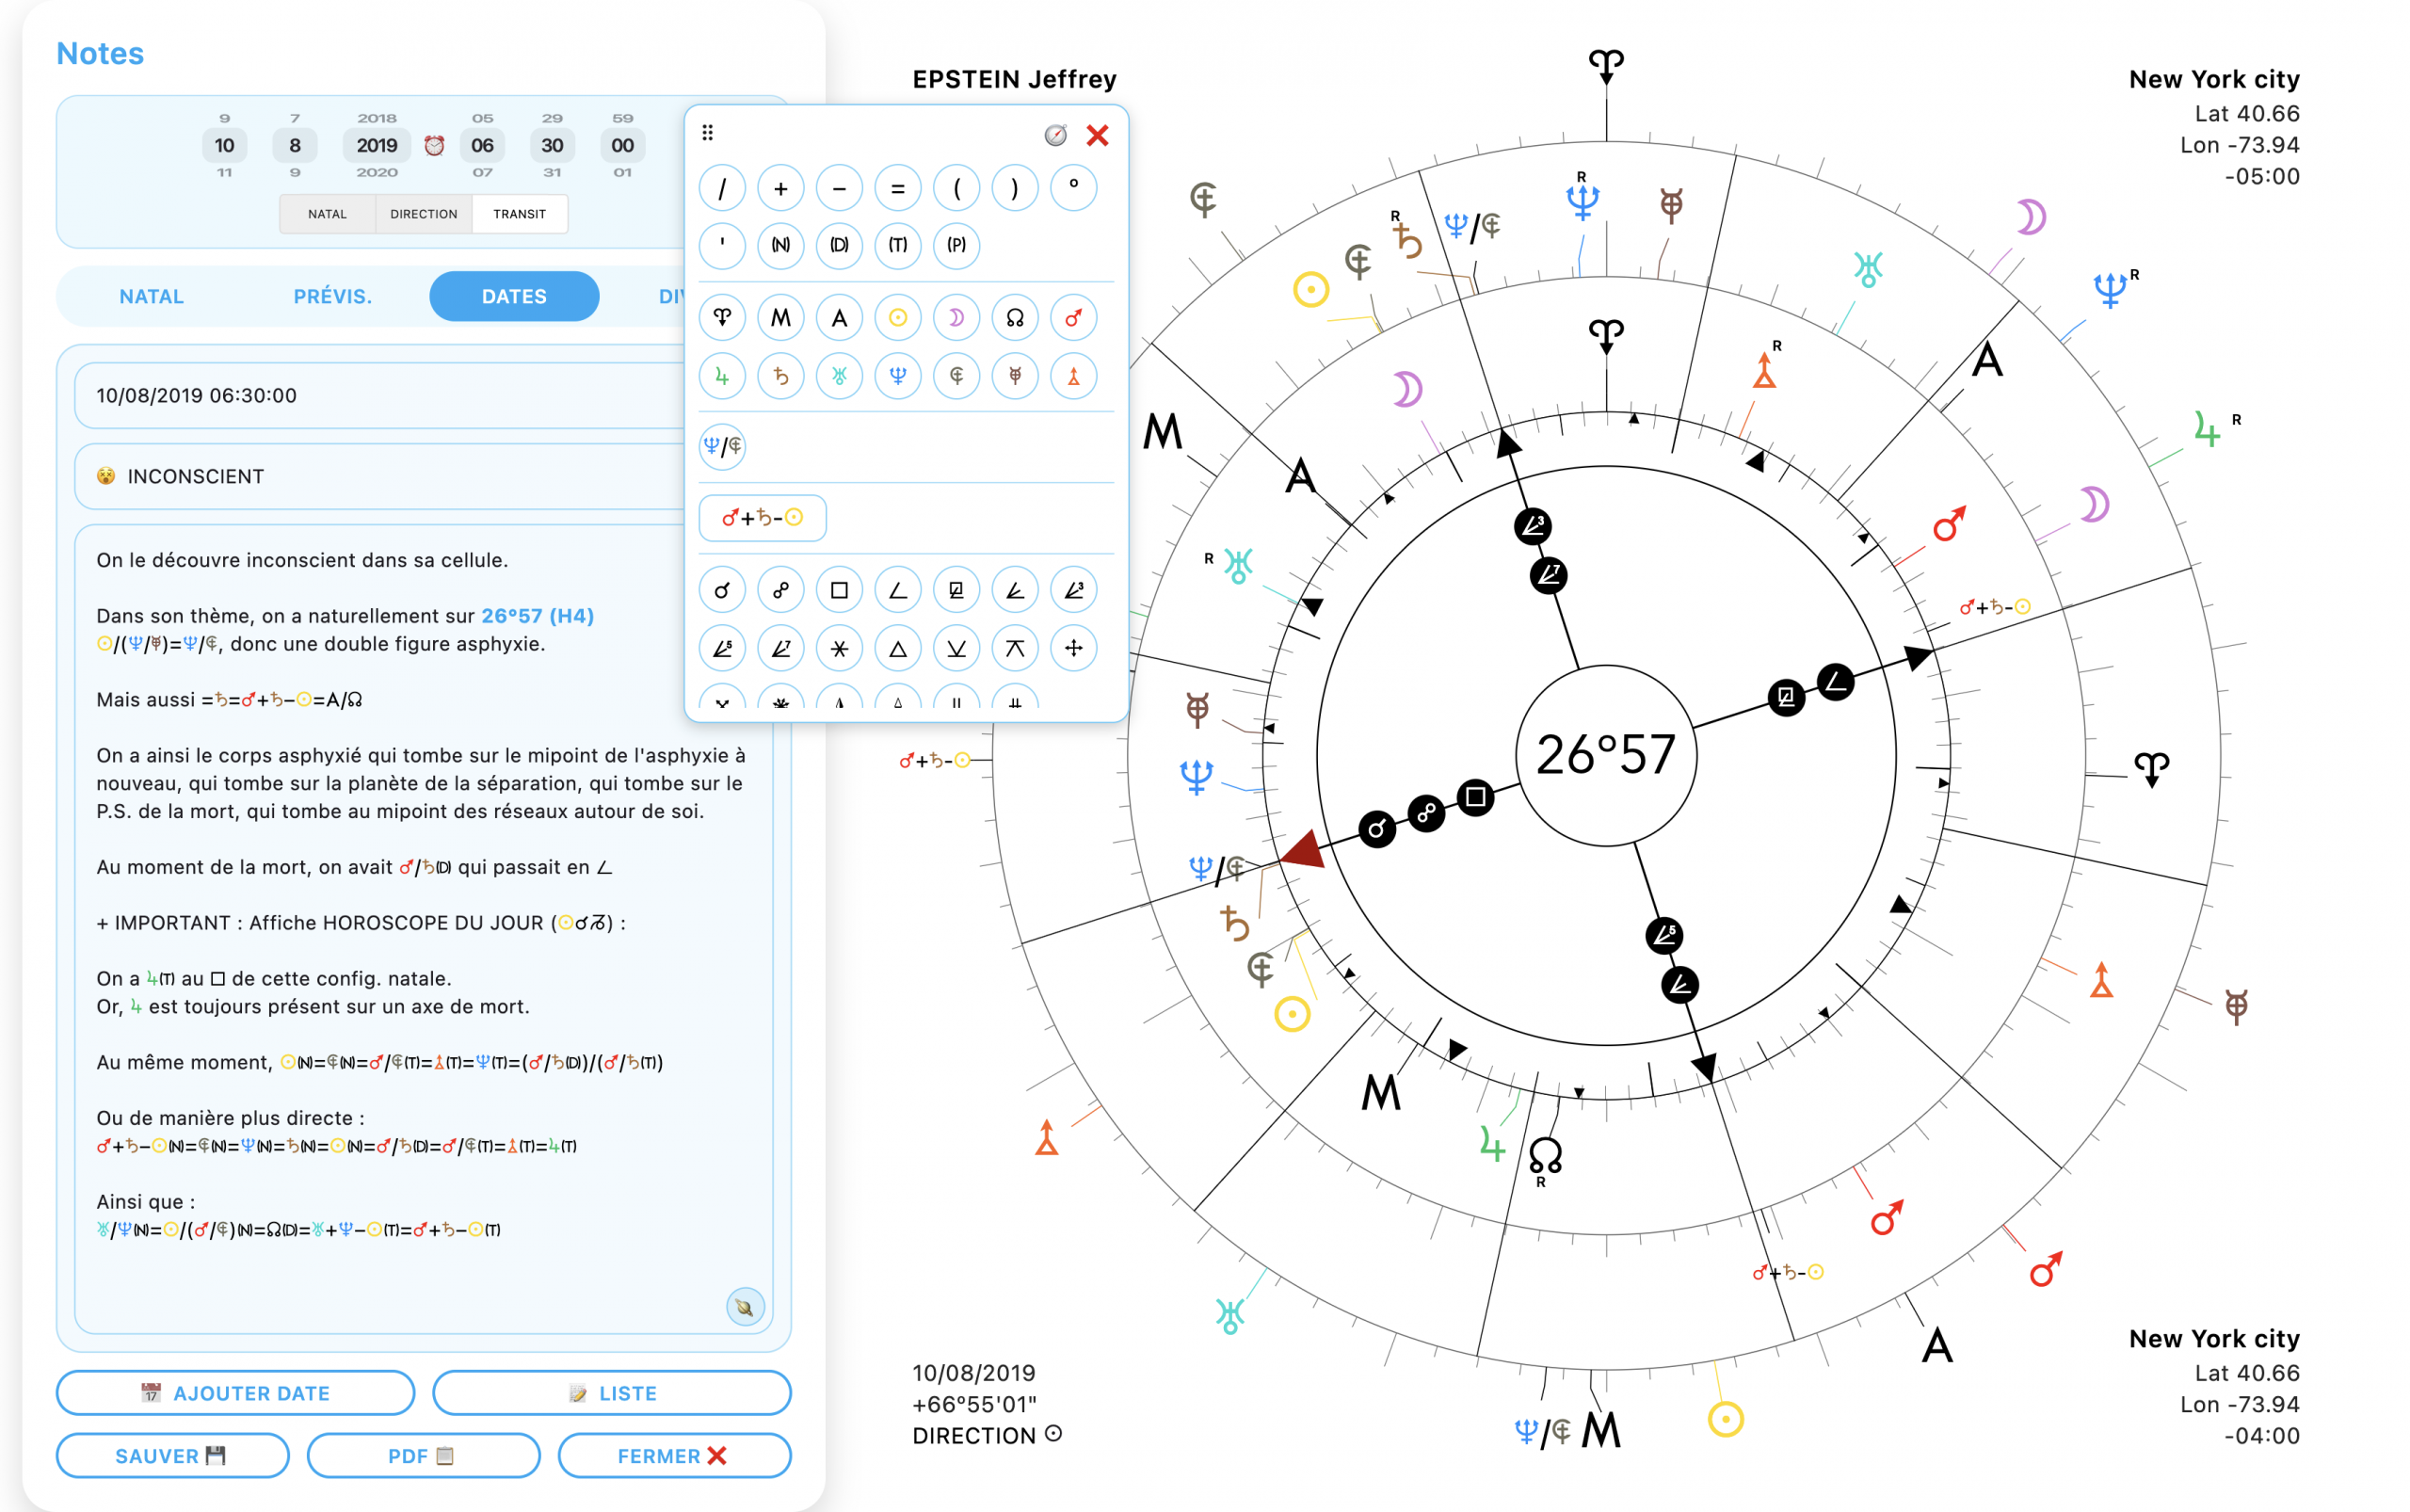
+ Because still in that pop-up (so, this one is exclusive to computers), there’s a 🧭 button in the top-right, right next to the ❌ button to close the window. When you click this button, it automatically inserts into the text the degrees to which the wheel arrow is rotated, as well as the wheel type (H1: 360º, H4: 90º, H16: 22º30, H64: 5º37, H256: 1º24 — H stands for Harmonic).
And this text insertion isn’t ONLY informative! If you click it, the wheel rotates exactly to that degree, and it even switches the wheel if you’re not on the right one! You’re on a 360º wheel and you click, for example, a link that says 85º00 H4 — well the wheel switches to the 90º format and the arrow rotates to 85º! It’s magic 😄
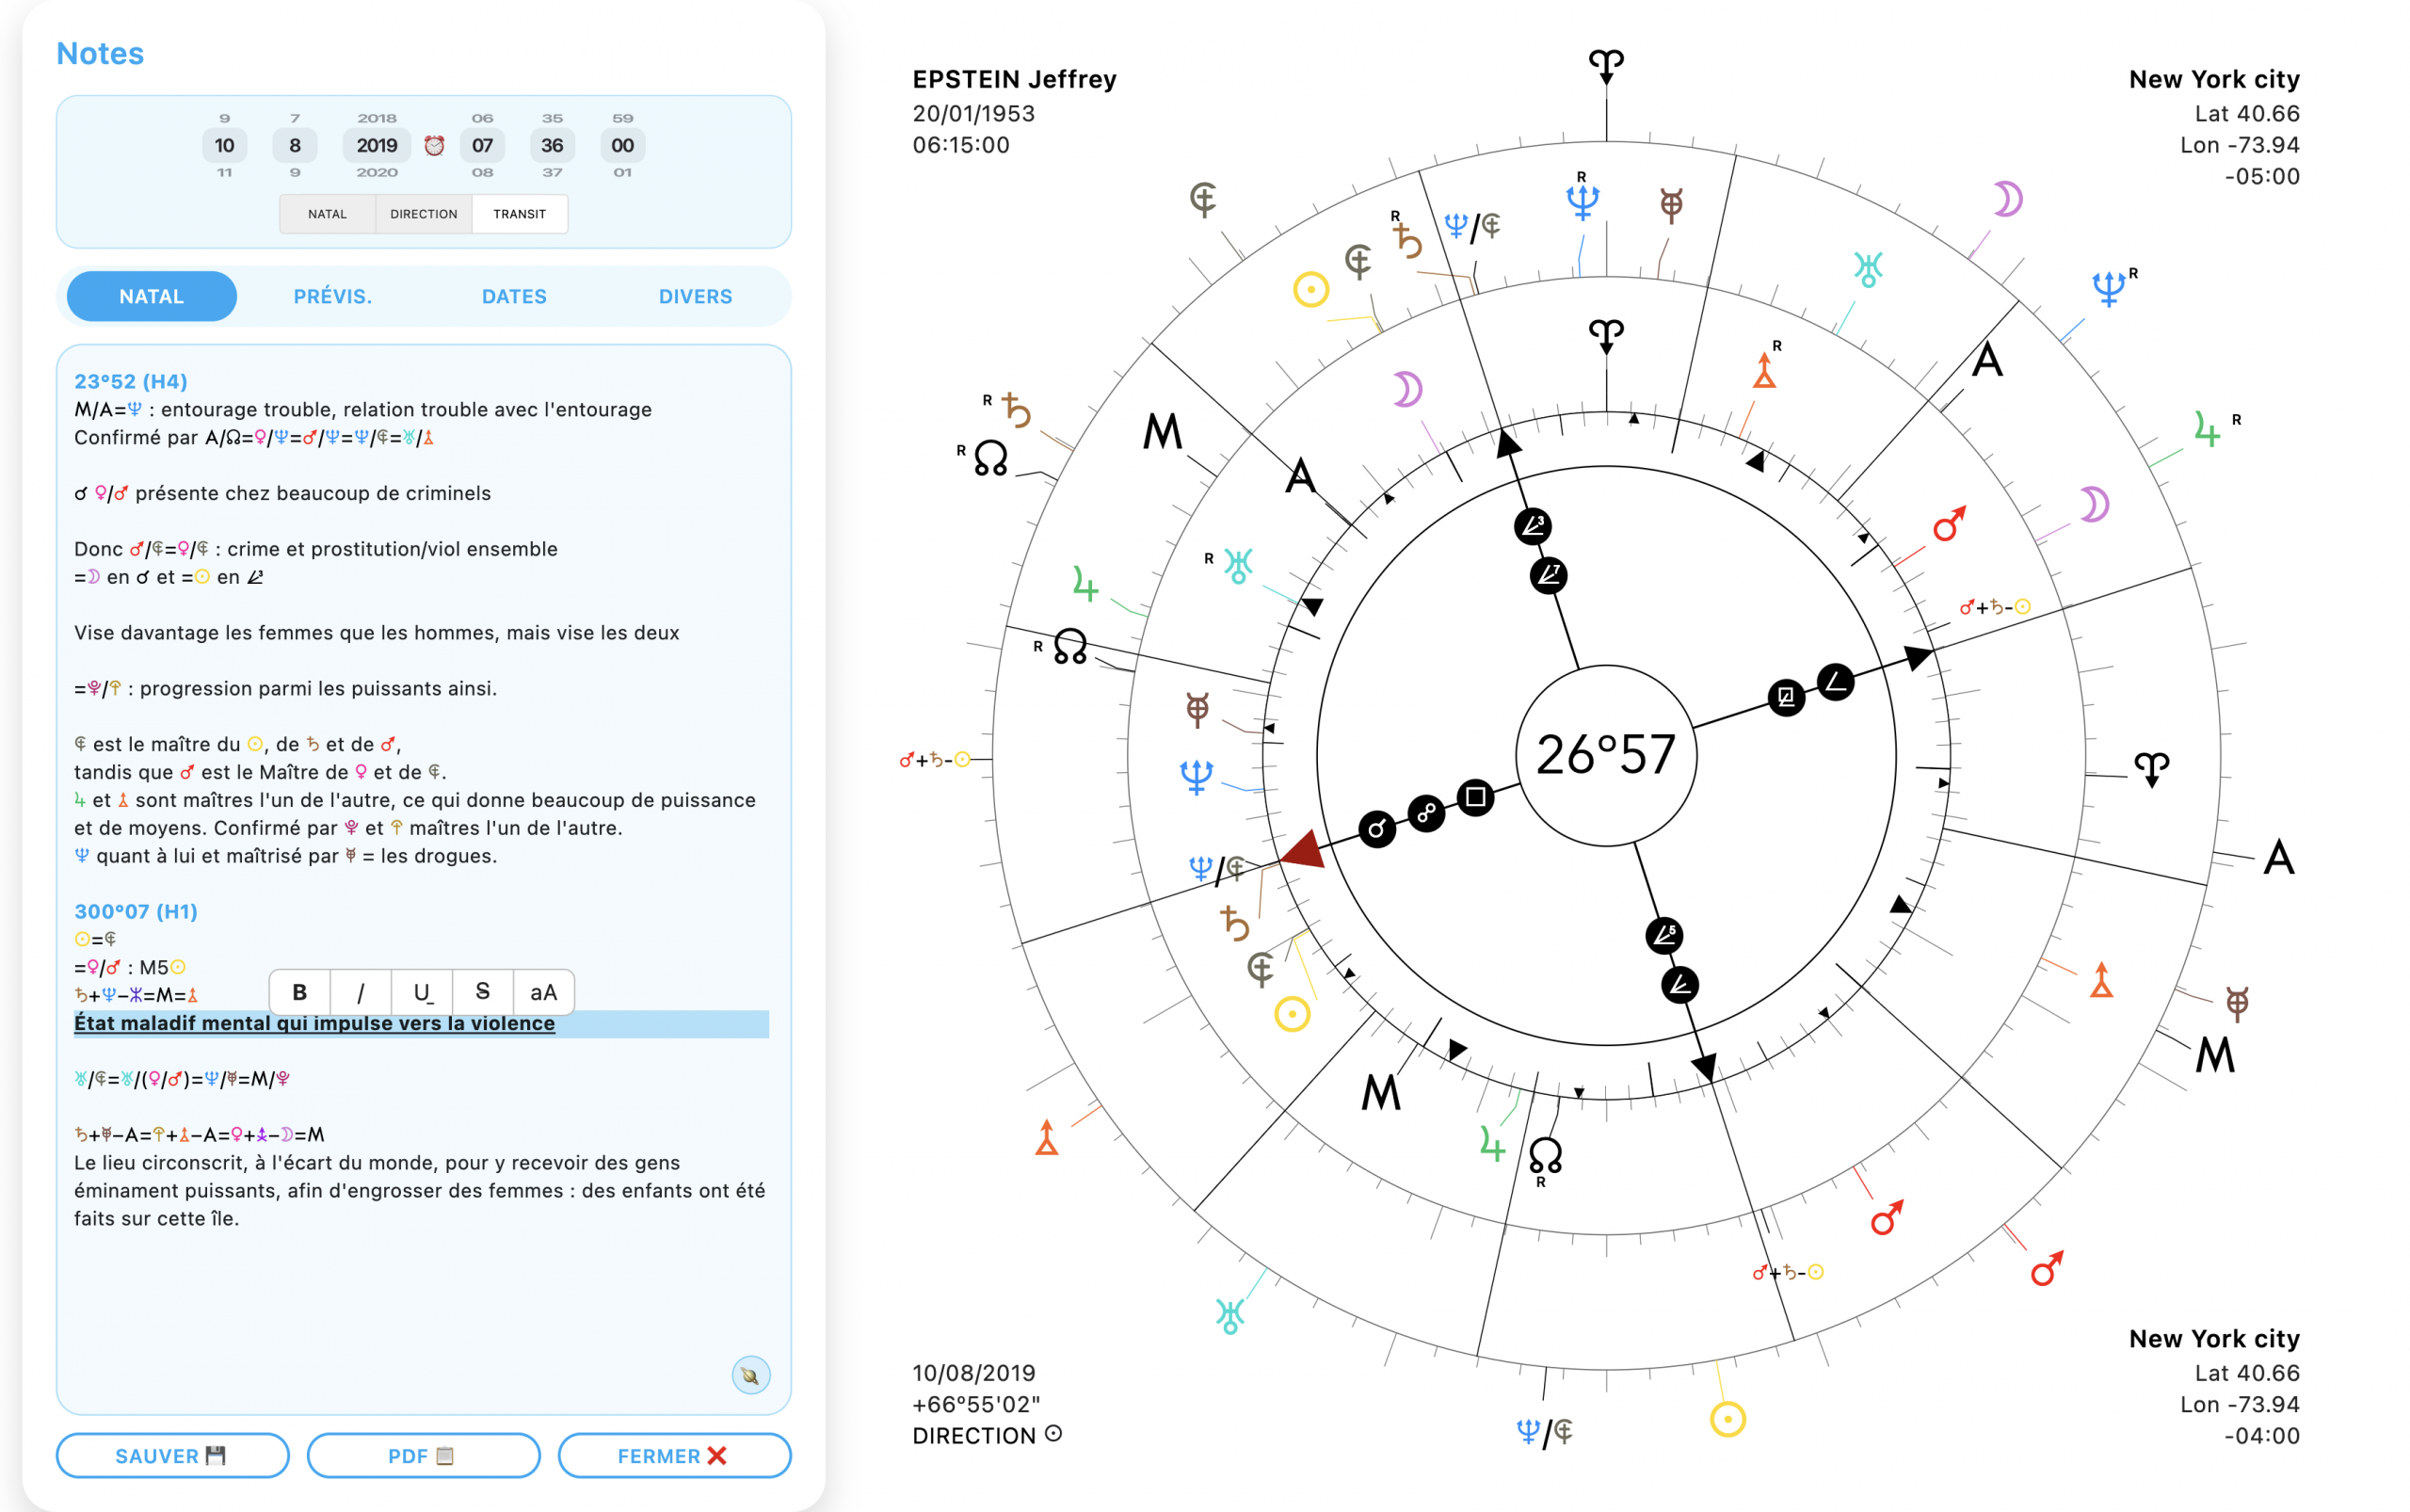
+ Another pretty slick addition: when you select text, you can make it bold, italic, underlined, struck through, change its case — all at the same time. Basically, it’s Disney in your eyes!
+ And finally, last but not least: everything you’ve typed in NATAL, FORECASTS, DATES, and MISC… can be exported as a .PDF!
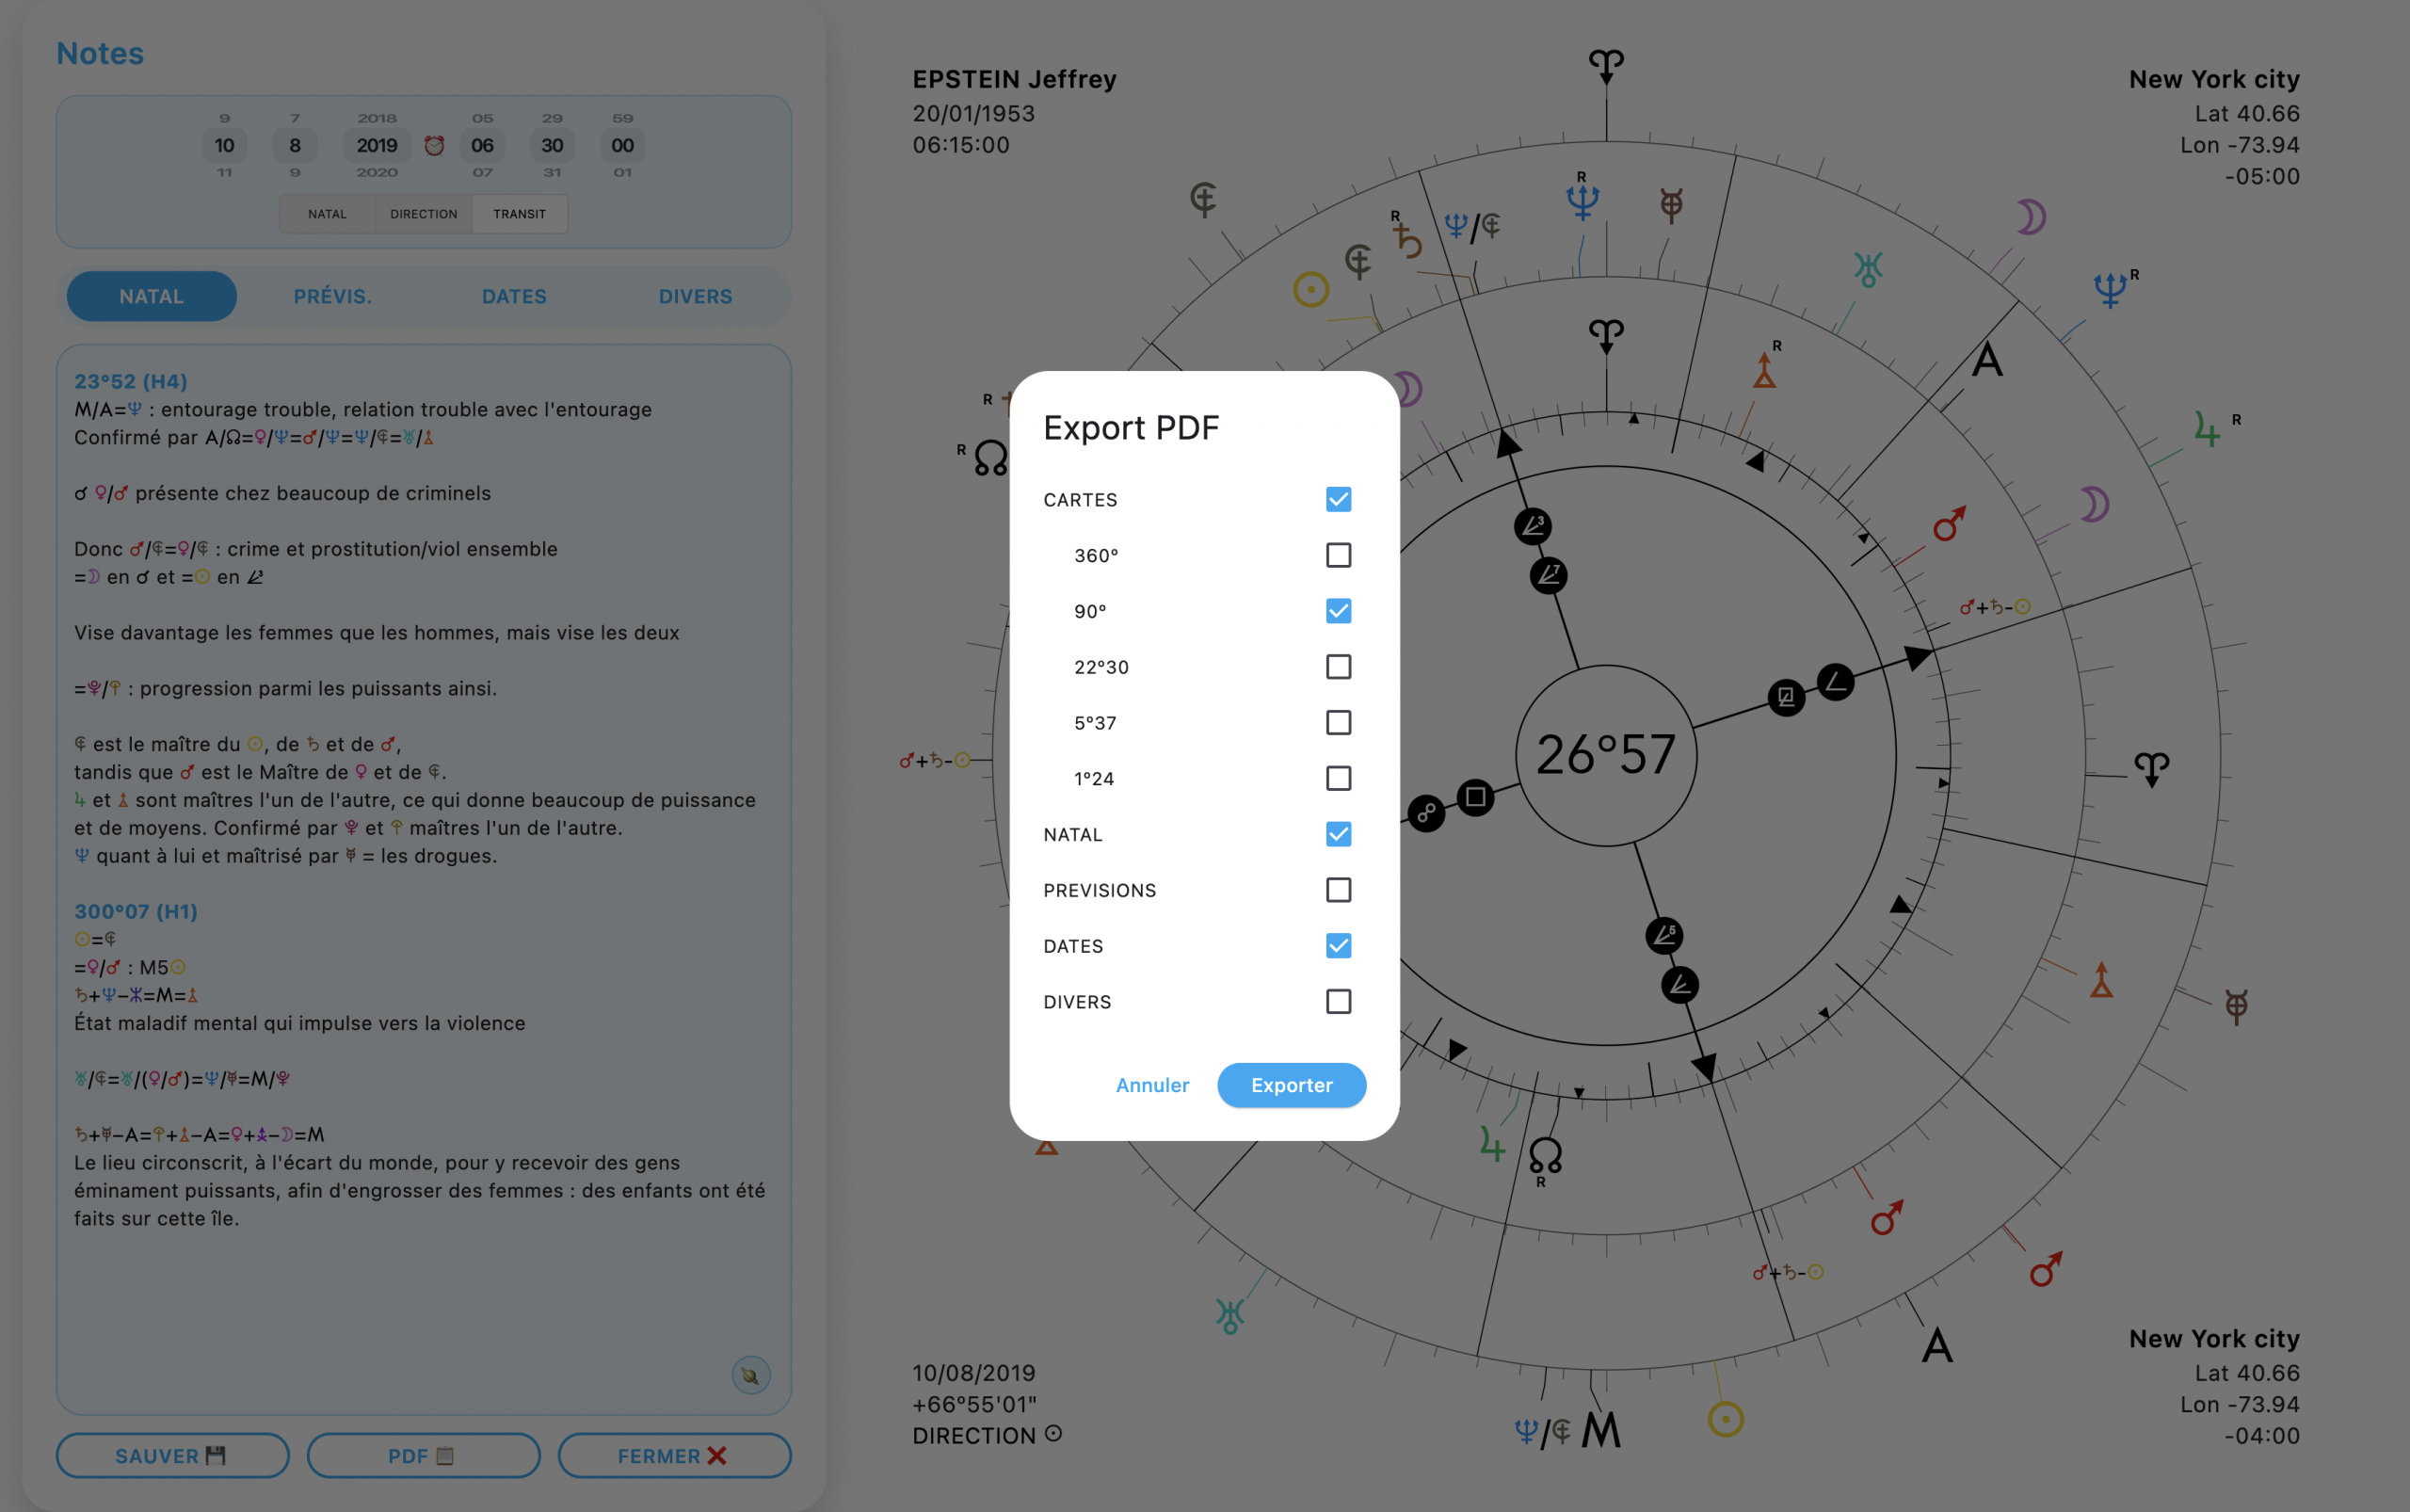
You can choose which sections to export, and also whether you want to add the sky charts. If you select the 360º charts, you’ll have the option to export a regular 360º wheel, or one with the “Houses” displayed on any personal points you want. IMPORTANT NOTE: if you display multiple levels on the wheel, the images will be exported with those multiple levels. But also, if the slider at the top is on DIRECTION or TRANSIT instead of NATAL, the Houses will be based on the personal points (A < > N Y W) of those levels! So make sure to set the slider to the position that suits you.
And that’s ALL… for today.
Now I’m going to rest.
Kisses, all that…